
How to Hang a Gallery Wall: No-Mistakes Guide
Key Takeaways
- Plan first: Lay out on the floor or use paper templates; keep 2–3 inches between frames and anchor with your largest piece;
- Measure smart: Hang around 57–60 inches to center; start in the middle or anchor point and work outward for balance;
- Choose a style: Eclectic (mix sizes/frames) or symmetrical (grid); stick to a cohesive color palette and mix vertical/horizontal pieces;
- Pick the right hanging method: Nails, strips, or no-damage adhesive frames like Mixtiles that you can reposition without holes.
Ready to create a gallery wall you’ll love without a patchwork of wrong holes? This guide shows you how to hang a gallery wall the right way, whether you prefer a collected, eclectic look or a timeless grid. We’ll cover spacing, layout, and three hanging methods, including a no-nail option with Mixtiles’ adhesive, repositionable photo tiles.
Design and preview your wall art now. Try the Mixtiles app to build custom grids, upload photos, and order Gallery Wall Kits that install in minutes. No tools, no stress.
What kind of gallery wall fits your space: eclectic or symmetrical?
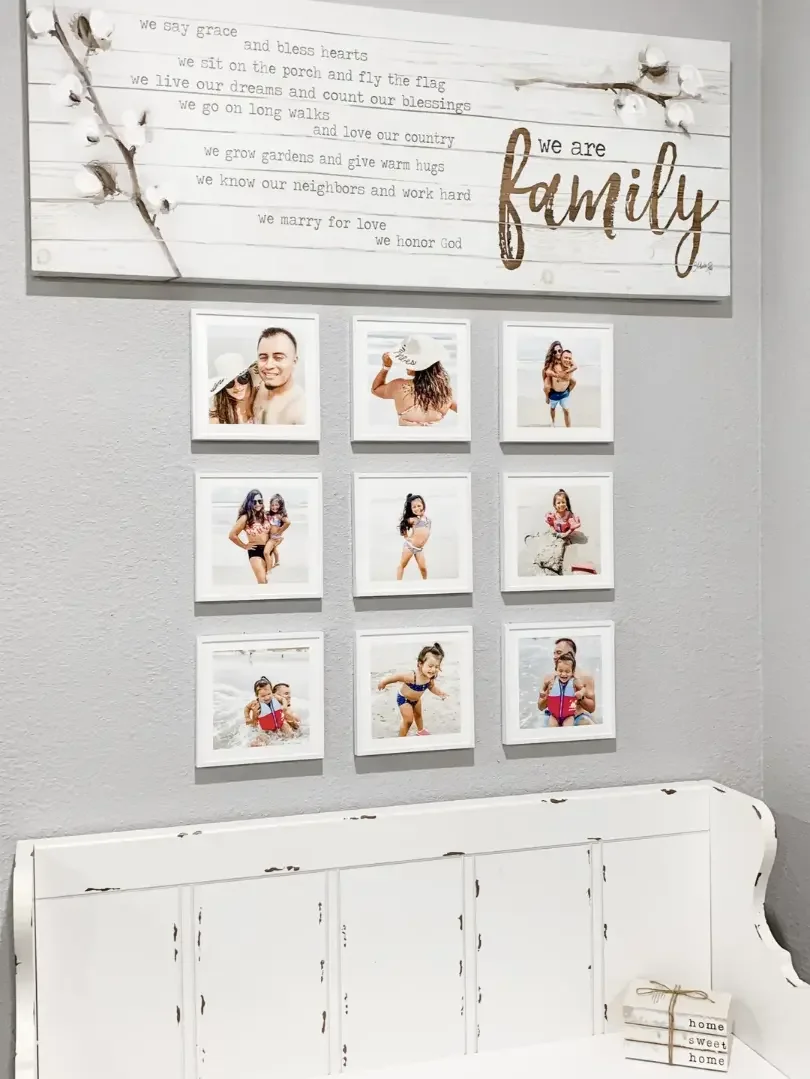
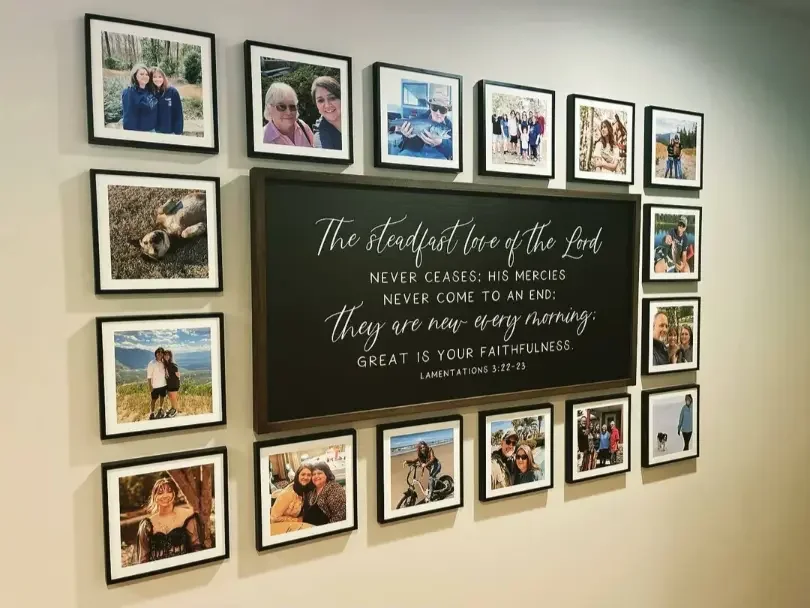
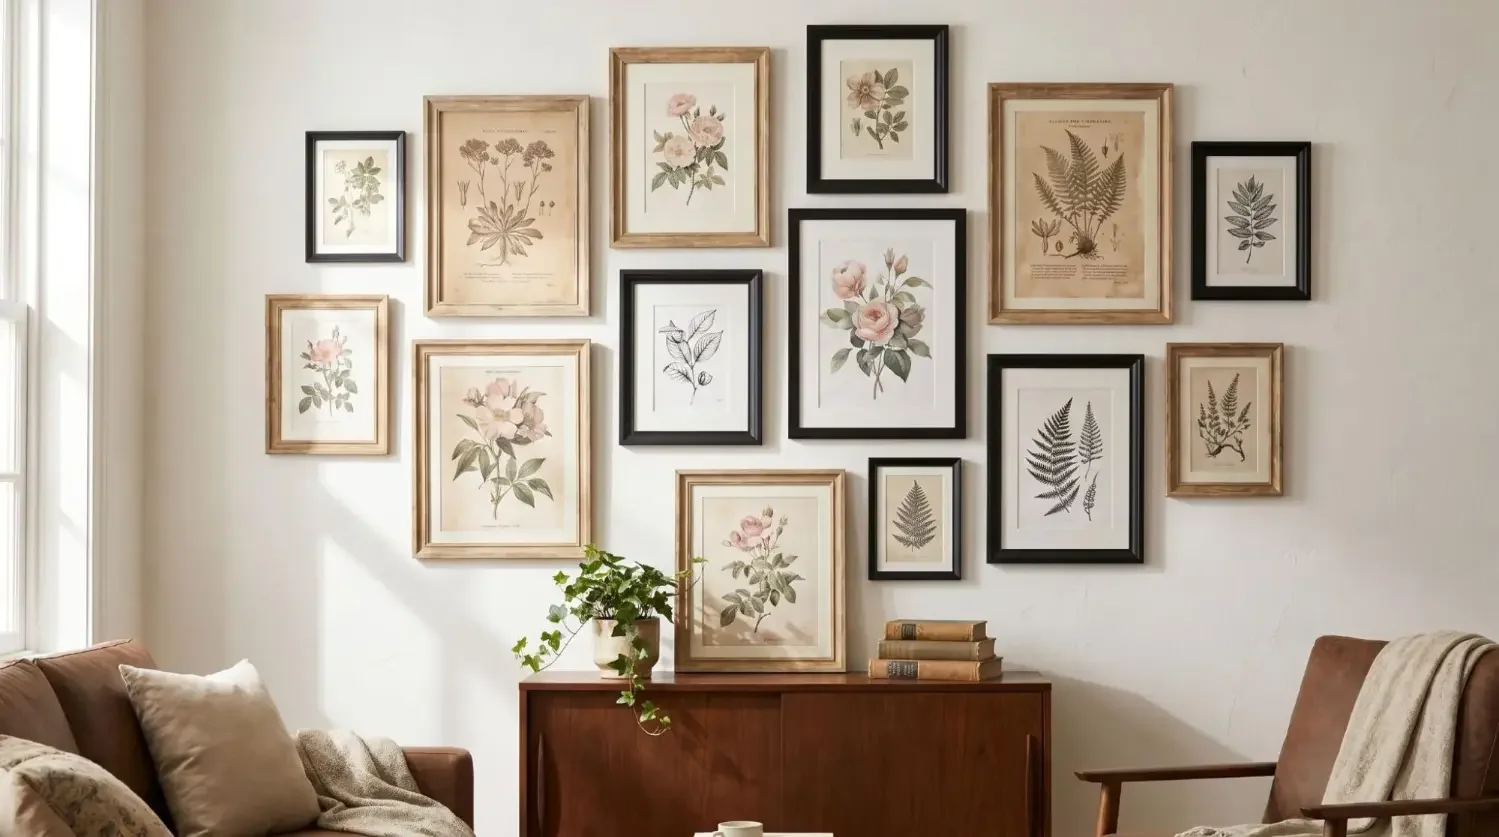
Start by choosing the style that matches your room and personality. Eclectic gallery walls mix picture sizes, orientations, and frame finishes for an organic look that feels collected over time. They shine above a sofa in the living room, along a stair wall, or in a home office. A symmetrical gallery wall uses uniform frames in a grid or tidy rows: clean, modern, and ideal for a hallway, dining room, or master bedroom. If you love calm order, go grid; if you want movement and layered stories, go eclectic. For impact, odd numbers read lively; for balance, even numbers feel serene.
How do you plan the layout without damaging your walls?
You can plan everything on the floor or with paper templates first, so your final hanging goes fast and flawless. No filler, no repainting, just confident placement.
The floor method (fastest)

Measure the wall area you want to fill, then tape the same footprint on the floor. Arrange your frames inside that boundary, placing the largest piece of art slightly off-center and the second largest diagonally to balance the composition. Move items until the picture grouping feels even, keeping frames roughly 2 inches apart; take a reference photo.
The paper-template method (most precise)

Trace each frame on craft paper, label it, and mark the hang points. Tape templates on the wall and adjust spacing to 2–3 inches apart. Use a level to align rows and make sure the overall design relates to nearby furniture (for example, 6–10 inches above a credenza), then commit to hanging.
The digital mockup (low effort)

Snap a straight-on photo of your wall and drop in frame shapes using a simple design app.
Try a no-risk trial run on the wall: use removable photo tiles to place, step back, and re-stick until your spacing and sightlines feel perfect.
How high and how far apart should you hang frames?
Aim to center the full gallery around eye level (about 57–60 inches to center) and keep consistent gaps. Over furniture, leave breathing room so the wall art looks connected to the room, not floating away.
Core measurements to remember
|
Scenario |
Imperial (inches) |
Metric (cm) |
|---|---|---|
|
Center height (museum rule) |
57–60 in to center |
145–152 cm |
|
Clearance above sofa/credenza |
6–10 in |
15–25 cm |
|
Spacing between frames |
2–3 in |
5–8 cm |
|
Gallery width vs. furniture |
~2/3 furniture width |
~66% |
|
Stairway centerline |
Follow stair rise |
Follow stair rise |
Safety and surface tips: On fresh paint, wait 30 days before using strips or adhesives. Drywall, painted plaster, and smooth wood accept Mixtiles’ adhesive backs; for brick or textured walls, consider our canvas prints with magnetic/alternate mounting. Always check weight limits and make sure surfaces are clean and dry.
Want a perfect grid fast? Our Gallery Wall Kits include templates, size charts, and coordinated frames so you can hang art in under an hour, no measuring marathon required.
How do you choose art, frames, and colors that feel cohesive?
Pick one or two hero images (maybe a large black and white portrait or a travel landscape) and build around them. Repeat a simple color palette (neutrals plus one or two accent hues) and limit frame finishes to three: for example, black, white, and light wood. Alternate verticals and horizontals to keep the rhythm lively, and consider mini pairs for symmetry inside an eclectic layout. Add personal touches: family photos, kids’ drawings, or tickets float-mounted in a shallow frame.
What’s the best way to hang: nails, strips, or adhesive tiles?
All three work; choose based on weight, wall type, and whether you want to move pieces later without repairs.
Traditional nails and hooks
Best for heavier frames and plaster or stud-backed walls. They’re strong and classic, but you’ll put holes in the wall. Mark hang points from the frame’s hardware, use a level, and add rubber bumpers to prevent shifting. If you hang art over a bed, ensure secure anchoring.
Damage-free strips
Great for rentals and lightweight frames. They remove cleanly but have weight limits and can drift with humidity. Clean surfaces with isopropyl alcohol, press firmly, and use top-and-bottom strips to keep frames level.
No-nail, repositionable gallery walls with Mixtiles
Mixtiles photo tiles are lightweight, adhesive, and re-stick without damaging paint: perfect when you want to experiment without commitment. Use the app to choose sizes and preview the design; mark a level baseline, place the center tile first, then work outward with about 2 inches apart. If a line looks off, just lift and re-stick. You can swap photos seasonally, expand the gallery wall as your collection grows, and finish a DIY project in minutes.
How do you avoid common mistakes (and fix them fast)?
Most issues come from height, spacing, or visual weight. Small tweaks will make the whole wall look new and intentional.
- Too high: Lower the grouping so the center sits around 57–60 inches; if there’s furniture, drop the bottom row closer to maintain 6–10 inches of clearance.
- Crowded or gappy: Standardize spacing at 2–3 inches apart; re-center the whole composition if needed.
- Visual imbalance: Move large or dark frames diagonally across from each other; add a medium piece to the lighter side to balance weight.
- Crooked lines: Use a laser level; with Mixtiles, lift, align to the level line, and re-stick without tools.
- All style, no story: Share your life: aim for 20–30% personal photos or a special piece of art to make the wall feel like home.
Can you build a gallery wall in a day? A quick checklist
Yes. With a plan and the right tools (or Mixtiles) you can start in the morning and relax by dinner, admiring your new wall.
Tools you’ll need
Gather these before you start so hanging stays smooth and on level:
- Tape measure, level or laser level, painter’s tape, pencil;
- Craft paper and scissors for templates;
- Nails and hooks or damage-free strips;
- Or just Mixtiles photo tiles if you want a no-tools install.
One-day plan
Follow this simple plan to get professional results without stress:
- Define Style And Anchor: Choose eclectic or grid, pick your hero piece, and set a color palette;
- Mock Up: Lay out on the floor or tape paper templates, keeping frames 2 inches apart, then take a photo;
- Mark Heights: Set center at 57–60 inches and confirm clearances above furniture;
- Hang Or Stick: Start at the center and work outward; with Mixtiles, place, check level, and re-stick until perfect.
A beautiful gallery comes from smart planning, consistent measurements, and the right hanging method. Now that you know how to hang a gallery wall (measure, mock up, and choose nails, strips, or Mixtiles) your space will look put together and personal, from the living room to the dining room.
Build your perfect gallery wall today. Start on the Mixtiles website or app to upload photos, preview layouts, and order adhesive, repositionable frames with free shipping. Make sure your walls tell your story, without holes, hassle, or guesswork.
Frequently Asked Questions
What is the 57-inch rule for hanging art?
Designers place art so its center sits about 57 inches from the floor (roughly eye level) so pieces feel visually connected. For gallery walls, set your main anchor or middle row around 57–60 inches, then build outward with consistent spacing and sensible furniture clearances.
What’s the general rule of thumb for a gallery wall?
Aim for a centered height of 57–60 inches, leave 2–3 inches between frames, and keep the total gallery about two-thirds the width of the furniture below. Start at the center or anchor piece and work outward, balancing visual weight as you go.
What does the two-thirds rule mean over furniture?
Your artwork (or the full gallery grouping) should span roughly two-thirds the width of the item beneath it. For example, above a 90-inch sofa, target about 60 inches in total width so the arrangement feels grounded, not undersized or overpowering.
How can I hang a gallery wall without nails?
Use damage-free options. Adhesive frames like Mixtiles stick to smooth, painted walls, lift cleanly, and re-stick. Clean the surface, mark a level baseline, place the center tile first, then space others 2–3 inches apart. If alignment’s off, simply lift and re-position.
Be the first to know — deals, news & decor ideas.
By clicking you agree to the Terms of Use & Privacy Policy