
What to Hang on Staircase Wall: Inspiring Ideas
- Transform your stairs into a personal gallery with photos, art, mirrors, shelves, textiles, and greenery, curated around a theme and a rising sightline;
- Use stair friendly layouts, diagonal grid, staggered step, center rail, with consistent spacing, safe clearances, and sizes that fit your run;
- Hang without nails using adhesive, repositionable frames like Mixtiles for fast installs, renter safety, and effortless seasonal swaps;
- Follow pro measurement shortcuts, avoid common mistakes, glare, crowding, poor heights, and use quick start templates to get it right the first time.
If you are wondering what to hang on a staircase wall, think beyond a few random frames. Stairwells are natural storytelling zones you pass every day. With the right mix of photos, art, mirrors, and textures, and a plan that follows the incline, you can create a striking, safe, and cohesive display. Below, you will find style ideas, proven layouts, sizing rules, and a no nails method to install and refresh your wall anytime.
Turn your favorite moments into a staircase gallery in minutes. Upload photos to create custom photo tiles, choose your frames, and hang them with our peel and stick backing. No tools, no damage.
What to hang on your staircase wall?
There are many creative wall decor ideas that fit your style and space. Use the list below to spark a plan you will love to see every time you go up the stairs.
- Family photos and portraits, black and white or warm edits for cohesion;
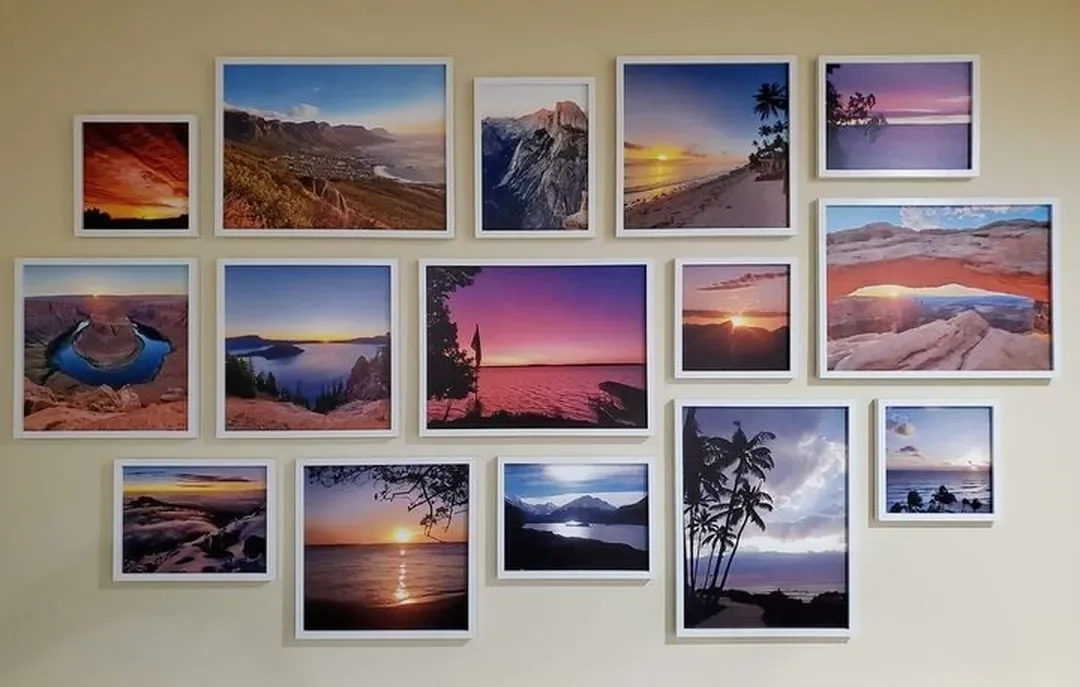
- Travel snapshots arranged as a trip timeline that tells a story as you climb;
- Art prints, abstracts, landscapes, botanicals, or line art wall pieces;
- A single oversized statement piece at a landing to make a bold focal point;
- Mirrors to bounce light in a narrow stairwell and add depth to the room;
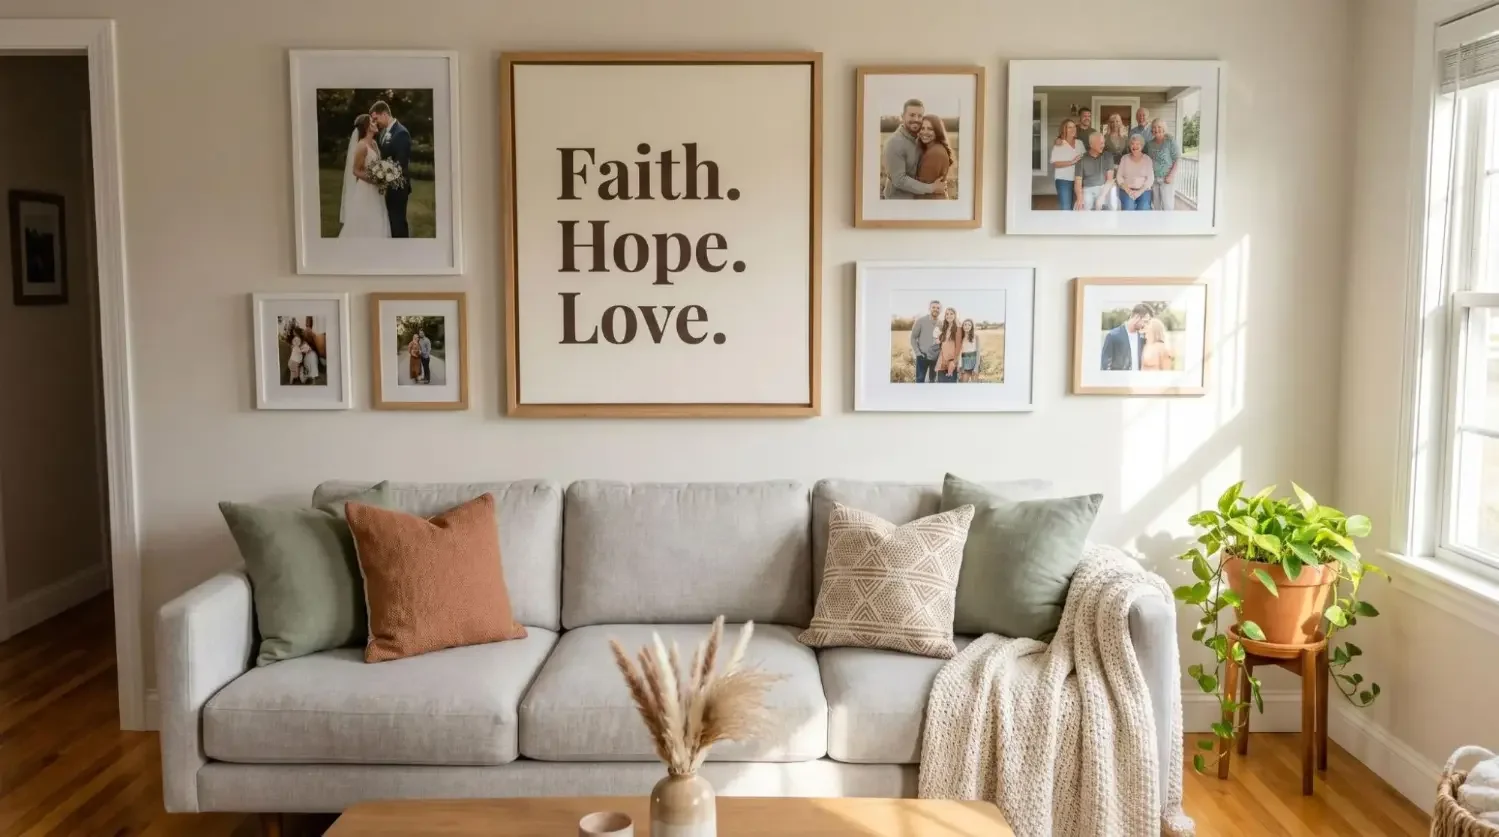
- Typography and word art, names, lyrics, or coordinates with personal meaning;
- Slim shelves or mini ledges for rotating pictures and small objects;
- Woven baskets, textiles, pennants, or flags for texture and a unique look;
- Wall safe planters with soft trailing greens to add a touch of nature;
- Vintage finds, clocks, ornate frames, or a reclaimed mirror for character.
Which gallery wall ideas work best on stairs?
The best staircase gallery walls echo the incline and keep a steady rhythm. Choose one of the proven layouts below so your pictures feel intentional from step one to step two and beyond. For even more configurations and inspiration, explore our staircase wall decor ideas guide.
Classic diagonal grid
Squares or uniform frames march up in a tight diagonal that mirrors the handrail. This sleek and modern approach is a great way to display your favorite photos with a crisp, gallery feel.
Staggered step pattern
Two interlocking rows create movement and flexibility for different size frames. It is ideal for mixed family photos, art, and wall art options that you want to mix and match.
Center rail layout
Anchor one visual rail at eye level, then add a few tiles above and below. This design is easy to expand over time as your collection grows.
Salon style cluster
Start with one anchor piece, then orbit smaller frames around it while respecting the stair rise. The result adds a collected over time character without feeling messy.
Landing feature wall
Place a large canvas print or fine art piece on the landing, then echo its colors up the adjacent rise. The landing acts like a visual pause that adds a touch of elegance. If you are considering an oversized piece, learn how to hang large art on a staircase safely and beautifully.
How do you plan a stair gallery that flows with the incline?
Plan with measurements first, then mock up. Keep a rising sightline around eye level, consistent gaps, and safe clearance from the handrail to get professional results. If you are unsure about sightline placement, read our quick guide on how high to hang art on a wall, including tips that apply to stairs and landings.
|
Parameter |
Imperial |
Metric |
Notes |
|---|---|---|---|
|
Sightline midpoint height |
57 to 60 in |
145 to 152 cm |
Track parallel to the handrail for natural viewing; |
|
Spacing between frames |
1.5 to 2 in |
4 to 5 cm |
Use one spacer for the full run; |
|
Handrail clearance |
2 in minimum |
5 cm minimum |
Prevent bumps on ascent or descent; |
|
Common tile sizes |
20 × 20, 20 × 28, 31.6 × 31.6 |
Squares feel tidy, rectangles add rhythm; |
- Map your sightline and obstacles: note switches, vents, and landings so you avoid gaps and keep the staircase wall decor safe and smooth;
- Choose your layout: diagonal grid, staggered, or center rail, based on the length of your stairs and the number of pieces you want to display;
- Pick frame sizes that fit your run: small to medium Mixtiles like 8 × 8 or 8 × 11 create steady rhythm, a large canvas on the landing adds drama;
- Mock it up with painter’s tape or paper cutouts: stand at the bottom and mid landing to confirm balance and spacing before hanging;
- Lock your spacing: cut a 1.5 or 2 inch spacer, then keep that gap consistent for a calm, cohesive gallery wall.
What sizes, spacing, and finishes look best on staircase walls?
Consistent sizes and finishes create calm. Strategic variation adds energy. Keep spacing steady, then repeat one or two finishes so the whole display reads as one design.
Sizes that suit the stair run
Small to medium tiles, 8 × 8, 8 × 11, 12 × 12, step neatly along the incline and keep the stairwell safe. Reserve a larger piece, 20 × 27 or 27 × 36 where available, for the landing so the wall can turn into a confident focal point.
Spacing for cohesion
Gaps of 1.5 to 2 inches between edges let the gallery breathe in a narrow space. Wider gaps can fragment a small stair, so tighter cadence usually looks best staircase to staircase.
Frame finishes that match your style
Black frames feel modern and architectural. White reads bright and coastal. Warm wood fits a farmhouse staircase wall or boho interior design. Repeat finishes for unity, or mix only two for balance.
Smart cropping
In portraits, keep eyes a touch above center so faces meet your gaze on the climb. Alternate wide scenes with close ups to add rhythm to your art wall decor.
Want ideas by style so you can move fast?
Pick a style you love, then translate it into frames, colors, and photo edits. Below are quick recipes that can easily fit your style and space.
Modern and minimal

Monochrome portraits in a neat diagonal grid with matte black frames. Clean lines, high contrast, and a sleek and modern feel that suits a modern staircase wall.
Cozy farmhouse

Warm wood frames, sepia family photos, and one vintage mirror as an anchor. Add a reclaimed clock for authentic stairway wall decor that feels welcoming.
Eclectic, collected over time

Blend family photos, abstract wall art, and small objects. Use one thread, a repeating color or frame profile, to keep the gallery walls cohesive.
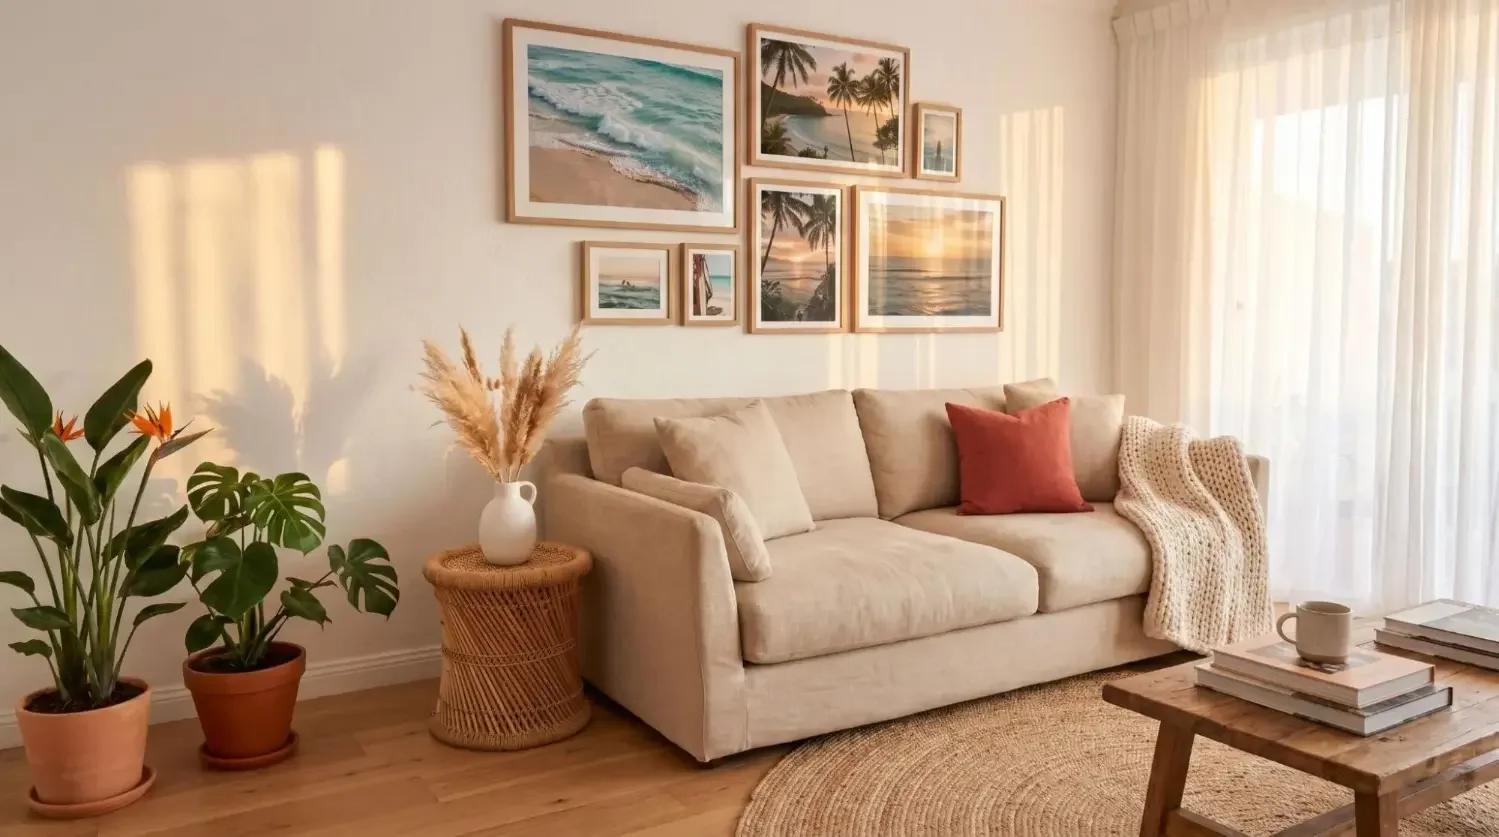
Coastal or airy boho

White frames, botanicals, and beach pictures. Light woods and soft textiles create an easy way to brighten small stairs and a living room to landing transition.
Vintage and moody

Paint the stairway wall a deep tone, then pair ornate frames with black and beige or black and white photos. Add warm sconces for a gallery look.
Design your stair gallery with zero guesswork. Explore our gallery walls for inspiration and try our curated kits with matching finishes. The peel and stick backs let you install in minutes and rearrange your wall art anytime. Create an account to save your layouts.
How do you hang frames without nails (and avoid wall damage)?
Use adhesive, lightweight frames like Mixtiles. They stick and restick on most painted walls, drywall, some textured walls, wood paneling, and even many wallpapers. Prep the wall with a dry microfiber wipe, then run painter’s tape parallel to your handrail as a rising baseline. Place the first tile near the lower third, press from center outward, then keep 1.5 to 2 inch gaps as you go. Because Mixtiles are repositionable, you can lift, adjust, and re-level without patching holes.
Avoid heavy, protruding objects near head height. On very rough brick or stucco, test one tile first. Fresh paint should cure 14 days before hanging. For more renter friendly methods and pro tips, see our full guide on how to hang wall art without nails.
Decorating a small, narrow, or dark stairwell?
Simplify the set, reduce depth, and brighten the imagery. Choose slim, shallow frames and smaller pieces so the passage feels open and safe. Prefer high key, bright photos or white bordered looks to reflect light. Add a mirror on the landing to bounce brightness into the stairs wall. Keep layouts tidy, a compact diagonal or center rail, so the space reads calm rather than cluttered.
How do you tell a cohesive story with your photos up the stairs?
Pick one theme, then edit consistently to create a unified staircase gallery wall. Try milestones from wedding to now, a travel sequence, or everyday family joy. Apply one preset across images to match color and contrast. Sequence with intention, alternate faces and places for rhythm. Reserve two to four spots for seasonal swaps so your wall art ideas evolve over time while staying cohesive.
What common mistakes should you avoid on stair walls?
- Hanging too high or too low, ignore the rising sightline;
- Uneven spacing that breaks the cadence and makes the gallery look messy;
- Overcrowding with no clear anchor: the eye does not know where to land;
- Glare from overhead lights: prefer matte prints and avoid direct hotspots;
- Ignoring safety near the rail or tight turns, keep a safe buffer at all times.
Need quick start templates you can copy today?
Use these ready to build sequences as a starting point, then swap in your photos or fine art prints. Each template adapts to different stair lengths and still looks intentional.
9 tile diagonal starter, modern
Arrange three by three squares stepping up with 1.5 inch gaps. Black frames with black and white portraits deliver a clean architectural vibe for a modern staircase wall.
12 tile travel story, eclectic
Alternate 8 × 8 and 8 × 11 in a staggered two row pattern using white and maple frames. Order by trip so every step feels like a mini itinerary.
16 tile family mix, welcoming
Build a center rail at eye level, then add satellites above and below. Keep edits warm so the staircase wall decor feels inviting from entry to landing.
8 tile kids’ art rotation, playful
Create two mini clusters on the lower half where kids can see their pieces. Swap each season with peel and stick tiles so updates stay easy and fun.
Landing spotlight plus stair echo
Feature one oversized canvas print on the landing. Echo its palette with six to eight supporting tiles as you continue up the rise for a strong, cohesive story.
Your staircase can turn into the most personal, high impact wall in your home. Start with a clear story, follow the incline with consistent spacing, and keep safety and light in mind. Whether you prefer a minimalist grid or an eclectic mix, a stair friendly layout and no nails installation will help you get it right the first time, then refresh it whenever life adds new chapters.
Make your staircase the wall everyone talks about. Create beautiful custom canvas prints in the app or on our website. Choose your frames and hang your new art without nails for fast, damage free decorating.
Frequently Asked Questions
What should I hang on a stairway wall?
Family photos, art prints, mirrors, slim ledges, textiles, small planters, or a wallpaper panel all work. Pick a theme, follow the handrail incline, and keep 1.5 to 2 inch gaps. Adhesive frames like Mixtiles make setup fast and damage free.
What should I put on the wall at the top of the stairs?
Choose a single oversized artwork, a statement mirror, or a compact gallery that echoes your stair display. Center the focal point around 57 to 60 inches, leave safe clearance, and coordinate the palette with nearby rooms for a polished transition.
How can I make the top-of-stairs wall feel intentional?
Treat it as a landing feature. Add a slim console shelf with a large piece above, or a mirror flanked by sconces. Repeat colors or frame finishes from your staircase gallery so the whole route reads as one cohesive story.
How do I decorate the wall behind or beside a staircase?
Keep the look clean and safe. Use a minimal grid of small to medium frames, maintain 1.5 to 2 inch spacing, and track the rise. Neutral frames and consistent photo edits create calm. Avoid deep objects near the handrail or head height.
Be the first to know — deals, news & decor ideas.
By clicking you agree to the Terms of Use & Privacy Policy