
How to Hang Canvas Art: 5 Easy, No-Damage Methods
Key Takeways
- Match your method to canvas size/weight and wall type: nails or sawtooth for small, D-rings with wire or J-hooks for larger pieces, and adhesive strips for renter-safe hanging.
- Prep matters: measure, mark a centerline height around 57 inches, level carefully, and add wall bumpers so your artwork stays put and your paint stays pristine.
- Use the right hardware for drywall, plaster, brick, concrete, or tile, and follow clear steps so each piece of art is safely hung at eye level and looks balanced in the room.
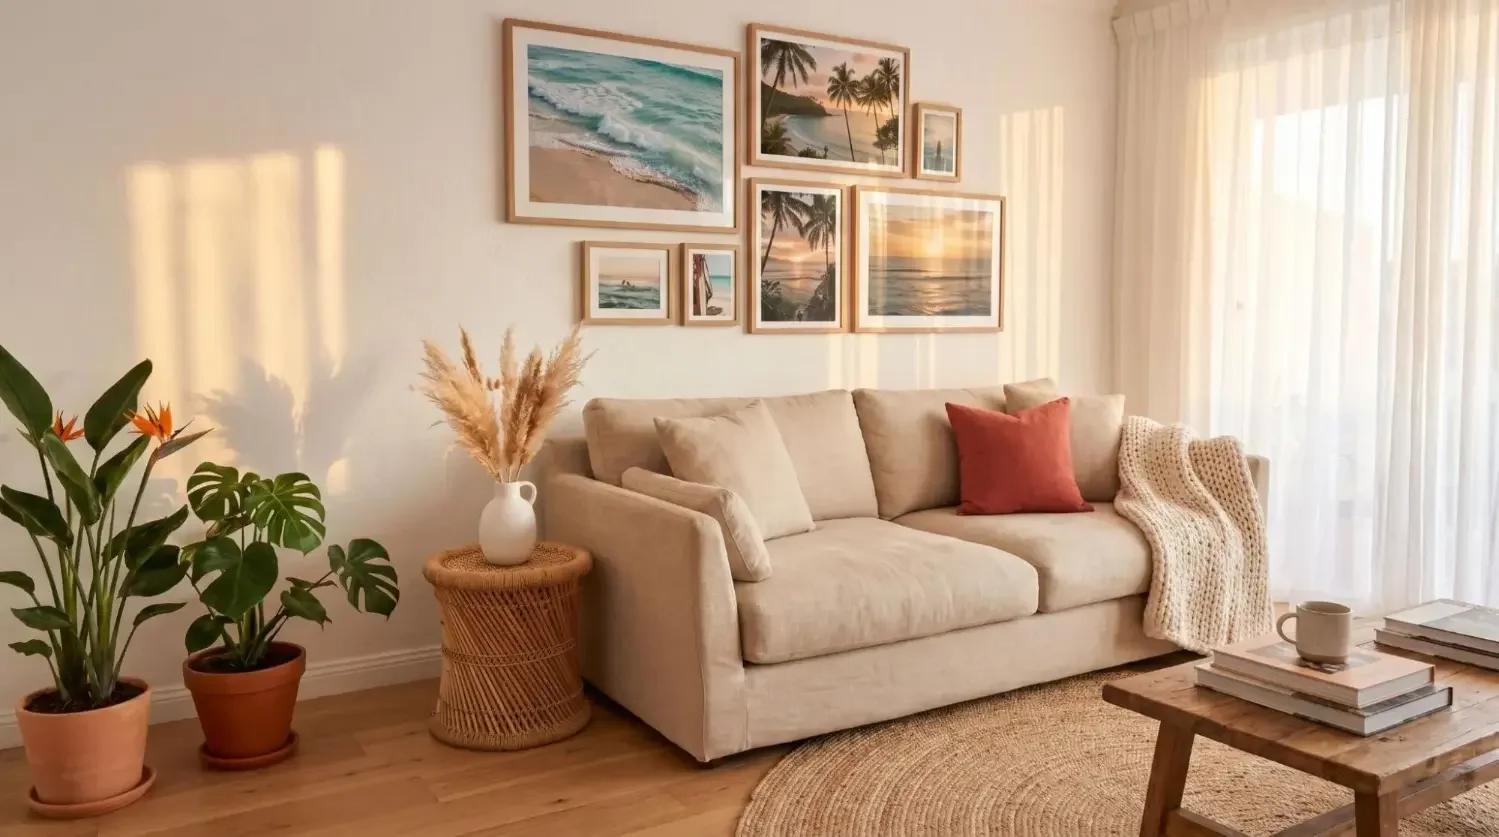
- For a truly easy, no-drill solution, Mixtiles stick and re-stick with no tools. Perfect for gallery walls, high ceilings, and frequent refreshes.
Hanging canvas art doesn’t have to be stressful. Whether you’re a renter aiming for no damage or a homeowner tackling a heavier statement piece, the right method makes it simple. In this guide, you’ll learn how to hang canvas art on wall surfaces of all kinds for nails, sawtooth hangers, D-rings and wire, J-hooks, and adhesive strips. You’ll also get layout, height, and leveling tips to finish at perfect eye level like a pro.
Want an easy way to hang pictures without tools? Try Mixtiles Photo Tiles and Canvas Prints: lightweight, peel-and-stick frames you can re-position anytime. Start designing now and make your blank walls a gallery you love.
What should you check before you start hanging?
Before you hang your art, confirm your wall type, the canvas weight, any existing back hardware, and the ideal height relative to your floor and furniture. This quick check will make the work faster, help you find the best way to hang, and ensure your pictures will look level and secure.
1. Start with the wall type
Drywall is most common, but many homes also have plaster, brick, concrete, or tile walls. If the room has been freshly painted, give it time to cure. Wait between 7 and 30 days before hanging anything.
2. Consider the size and weight
Small pieces (around 4–6 lb) usually hang well on a single nail. Medium pieces (6–12 lb) often need sawtooth hooks or wire. For larger, heavier works (over 12 lb), use sturdier supports like J-hooks or wall anchors.
3. Check the back of the frame
You might see a sawtooth hanger, D-rings, or a wire already installed.
If not, you can easily add the appropriate hardware before hanging.
4. Think about placement
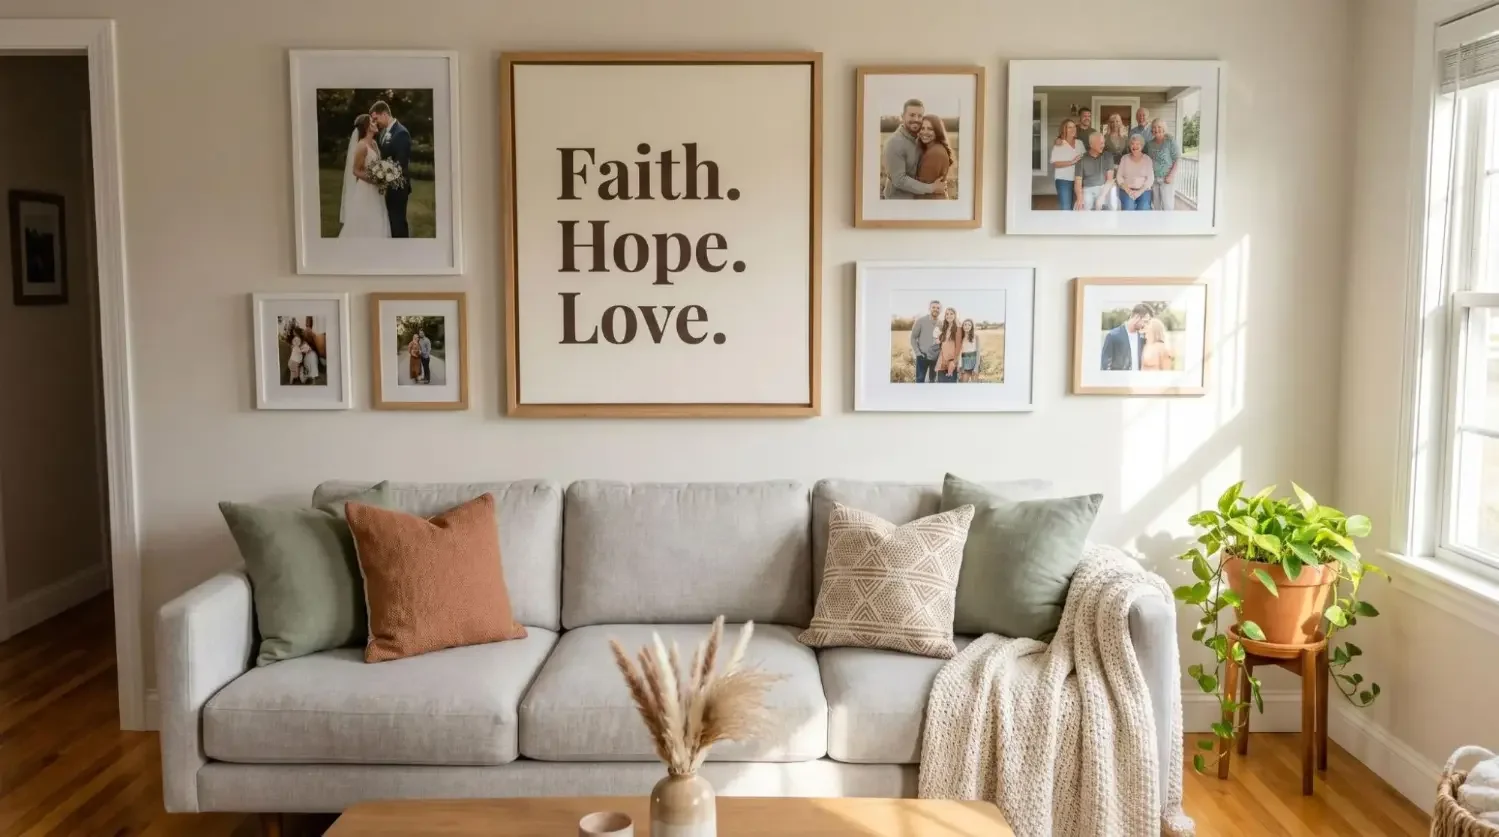
Is this a standalone focal point or part of a gallery wall? A good starting guideline is the 57-inch rule of thumb: position the center of the artwork about 57 inches from the floor, or roughly 6–10 inches above a piece of furniture like a sofa or console.
5. Keep safety and movement in mind
Avoid hanging art where doors swing open or in spots where small hands can reach or tug. Good positioning ensures both visual harmony and safety. Finally, consider safety and traffic paths so the piece isn’t where doors swing or where little hands can tug.
Which tools and supplies do you actually need?
You don’t need much. A level, tape measure, and the right fasteners will make hanging artwork simple and keep everything at perfect height.
Core tools
Keep a pencil or painter’s tape handy for marking your center point; a tape measure and level to ensure true eye level; a hammer and screwdriver for most hanging tasks; and a stud finder or quality anchors if you can’t hit a stud. Clean the wall with a soft cloth first, and add wall bumpers or felt pads to the bottom corners so the frame doesn’t scuff the paint or drift.
Hardware by method
Small canvases often work with simple nails, while sawtooth hangers plus two small nails add stability. Wider or heavier artwork benefits from D-rings with coated picture wire. J-hooks are a strong, minimal-damage option for heavy or wide pieces. For a no-drill approach, weight-rated adhesive strips are easy, just follow the packaging guidelines carefully.
How do you hang a small or medium canvas with a single nail or sawtooth hanger?
For lightweight pieces, a single nail or a sawtooth hanger is the easiest way to hang a picture at eye level. Both methods are quick, clean, and ideal when you don’t want to overthink hardware.
Method A: One or two nails (light canvases)
Follow these steps to hang your art quickly and cleanly:
- Mark the center point on the wall at your chosen height, then lightly clean the area so the canvas sits flush;
- Hammer one nail at a slight upward angle and leave 1/2–1 inch exposed (use two nails for slightly wider pieces to improve levelness);
- Hang the canvas on the nail head, add bumpers to the frame’s bottom corners, and adjust until perfectly level.
When to use: This is great for small formats (for example, 8×10 or 12×16) that have a sturdy stretcher bar or a built-in lip on the frame.
Method B: Sawtooth hanger (stable and simple)
Attach a sawtooth hanger to the top stretcher bar at the true center using the provided screws. On the wall, mark two level points spaced to match the outer notches of the sawtooth, then tap in two small nails so the heads support the serrations. Rest the serrated bar on the nails, nudge until the level bubble is centered, and the piece will look crisp and straight. This method is a common favorite for hanging a piece quickly while keeping a low profile on the wall.
How do you hang a larger canvas with D-rings and wire?
Use D-rings and coated wire when a canvas is wider or heavier. This setup spreads weight, offers micro-adjustments, and makes it easy to re-level after the first day.
Install the hardware
Attach a D-ring to each side stretcher bar, about one-third of the way down from the top; confirm both rings sit at the same height to avoid a crooked hang. Thread coated picture wire through the first D-ring, loop it twice, and wrap the tail neatly around itself. Run the wire across to the second ring and repeat, leaving a slight arc so you can hook the wire onto wall fasteners without straining the frame.
Mount to the wall
Mark two level points a few inches apart. If you find a stud, drive screws at a slight upward angle; otherwise, use weight-rated hooks or drywall anchors that match or exceed your canvas weight. Hang via the wire, tug gently to seat it, then add bumpers and check level and wire tension. This approach works beautifully for large pieces of art in a living room where you want a secure, professional finish.
Should you use J-hooks or wall anchors for wide or heavy pieces?
Yes: J-hooks are often the best choice because they distribute weight and cause less wall damage than big screws. Choose single- or double-nail hooks by load rating, and use two hooks for wide frames so the artwork won’t drift. When you can’t hit a stud in drywall, weight-rated anchors are a smart backup. Always check packaging for the -inch rule equivalents and maximum loads; when uncertain, overspec so your art will stay secure.
Want a faster path? Mixtiles Canvas Prints include peel-and-stick or magnetic mounting options, no measuring marathon required. Create yours today and hang your art with confidence.
Can you hang canvas art without nails if you’re a renter?
Absolutely. Adhesive strips and Mixtiles make no-damage hanging easy, especially when you don’t want holes in new walls or you don’t want to “guess and check.”
Adhesive strips (no-drill, no-damage)
Adhesive strips are a great way to hang art when you don’t want tools. Ensure the paint is smooth, fully cured, clean, and dry. Press strips onto the frame (often near all four corners) then press the canvas to the wall per instructions. Respect cure times and weight limits, and avoid heavily textured walls or humid rooms where adhesion can fail. If you don’t want surprises, take a photo of the layout first so you know where each piece will go.
A simpler alternative: Mixtiles
Mixtiles are lightweight, adhesive, and repositionable. Stick, re-stick, and remove cleanly: perfect if you don t want damage, you want to hang a gallery quickly, or your ceilings are high and you need an easy starting point. Our services also include Gallery Wall Kits with templates so your design will look seamless at eye level.
What’s the best approach for brick, concrete, plaster, or tile?
Use surface-appropriate hardware. Masonry needs plugs or clips, plaster needs thoughtful pilot holes, and tile rewards a slow, careful approach. Choose the method that protects your wall and matches your canvas weight.
Brick and concrete
For these tough walls, use a masonry bit and wall plugs with screws or heavy-duty hooks. Brick clips that grab mortar joints can hang pictures with no drilling. Adhesives don’t work well on rough or porous surfaces, so test cautiously if you must.
Plaster walls
Pre-drill small pilot holes to avoid cracking, and use anchors suited for plaster and lath. Go slowly, avoid over-tightening, and confirm the piece is level before letting go.
Tile
Whenever possible, drill into grout lines with a masonry bit and use appropriate anchors. Tape the tile to reduce slipping, go low and slow on pressure, and skip adhesives in humid bathrooms where they can fail.
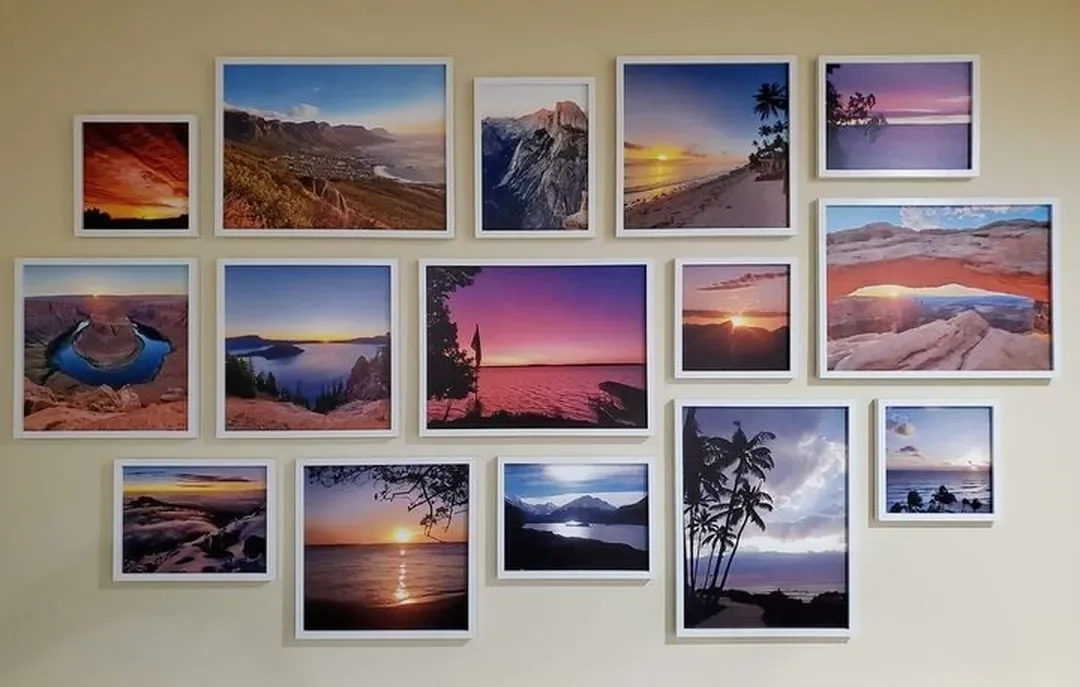
How high should you hang canvas art? And how do you plan a gallery wall?
As a rule of thumb, the perfect height to hang is eye level, about 57 inches to the center. Above furniture, keep 6–10 inches of breathing room. For a gallery wall, start with one anchor piece at center, then build around it.
Single piece placement
In a living room or hallway, the 57-inch rule is a reliable starting point; for tall people or high ceilings, you can go slightly higher so the art feels balanced. Above a piece of furniture like a sofa, keep the bottom of the frame 6–10 inches above the top edge, and aim for a width that’s roughly two-thirds of the furniture below so the piece will look proportionate.
|
Scenario |
Recommended Measurement (inches) |
Recommended Measurement (cm) |
|---|---|---|
|
Center of artwork from floor (eye level) |
57 (starting point) |
145 |
|
Artwork above furniture (sofa, console) |
6–10 between frame bottom and furniture top |
15–25 |
|
Gallery wall spacing between pieces |
2–3 between frames |
5–8 |
|
Maximum width above furniture |
About 2/3 of furniture width |
About 67% of width |
Gallery wall planning
Lay out pieces on the floor first, take a photo to see the overall design, then translate the arrangement to the wall. Use paper templates to mark each hang point at the right height to hang, and begin with the anchor piece at eye level. Build outward, keeping consistent spacing so the whole gallery wall will look cohesive.
Troubleshooting: Why is my canvas crooked or keeps falling?
Run through this quick checklist before you re-hang your art:
- Crooked artwork: Your marks may not be level; raise or lower one hook slightly, or add a second hook so the frame can’t tilt.
- Frame drifting: Add felt bumpers or switch to two-point hanging so the piece of art stays steady at the center.
- Falling canvas: Hardware may be underrated or the wall surface is incompatible; upsize to J-hooks or anchors and follow the package weights.
- Uneven wire tension: Re-thread the wire and match D-ring heights so the picture will hang flat.
With the right prep and method for your wall type and canvas weight, learning how to hang canvas art on wall surfaces is straightforward. Measure carefully, choose nails, sawtooth, D-rings with wire, J-hooks, or adhesive strips based on the piece and the room, and finish with bumpers so everything sits level. Whether you hang pictures as a single focal point or plan a full gallery wall, these tips for hanging will make your home feel polished and personal.
Prefer a beautiful, no-drill solution you can rearrange anytime? Build a gallery wall in minutes with Mixtiles: lightweight, adhesive, and fully repositionable.
Frequently Asked Questions
What’s the simplest way to hang a canvas on a wall?
Match method to weight and wall. Mark center about 57 inches high, level a light line, then: small canvases = single nail or sawtooth; medium/large = two J-hooks or D-rings with wire; heavy = anchors or a stud. Hang, level, and add felt bumpers to prevent drift.
How do I hang a canvas without nails (renter-friendly)?
Use weight-rated adhesive strips or Mixtiles. Let paint cure 7–30 days, clean with isopropyl alcohol, apply strips near all corners, press 30 seconds, and follow cure times and weight limits. Avoid textured walls and humidity. Mixtiles stick, re-stick, and remove cleanly: perfect for galleries.
What’s the best way to hang an unframed canvas?
For a stretched (unframed) canvas, attach a centered sawtooth or install D-rings with coated wire and hang on two hooks for stability. For unstretched canvas fabric, first stretch it onto stretcher bars or use magnetic poster rails for a quick, no-drill display.
Beginner basics: how do I mount a canvas painting?
Start with placement: aim the center at ~57 inches or 6–10 inches above furniture. Lightly mark and level. Choose hardware by weight: sawtooth for small, D-rings/wire or J-hooks for larger. Hang, fine-tune with a level, and add bumpers. Nervous? Try peel-and-stick Mixtiles.
Be the first to know — deals, news & decor ideas.
By clicking you agree to the Terms of Use & Privacy Policy