
How to Clean a Canvas Painting: Expert Tips for Care
Key Takeaways
- Always dust first and spot-test; use a barely damp, lint-free cloth with a mild, pH-neutral solution for surface grime, never harsh household cleaners;
- Identify paint and surface (oil vs. acrylic, varnished vs. unvarnished) and call a pro for valuable, antique, moldy, or yellowed-varnish pieces;
- Control light, heat, and humidity; routine gentle dusting prevents buildup and keeps canvases vibrant longer;
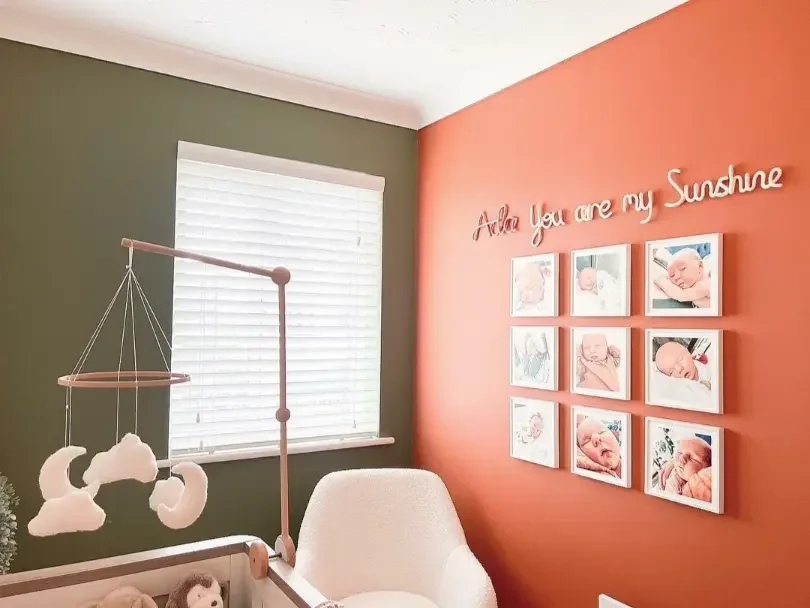
- Canvas prints and photo tiles require simpler care; for low-maintenance wall art, Mixtiles wipe clean and reposition without tools.
Keeping your artwork clean can be simple, if you use the right methods. This step-by-step guide explains how to clean a canvas painting safely, what to avoid, and when to call a professional. You’ll learn gentle techniques for oil and acrylic paintings, how to handle tougher grime, and smart prevention tips. We’ll also compare canvas paintings with canvas prints and easy-care photo tiles like Mixtiles.
Ready for low-maintenance wall art you can rearrange anytime? Design and order Mixtiles photo tiles on our app or website. They stick, restick, and wipe clean without nails.
What should you check before you start cleaning?
Before you clean a canvas, identify the paint type and surface condition. If you’re unsure or the piece is valuable, take a pause: missteps can damage fine art. A quick assessment helps you choose the best way to clean without risk.
Is it oil, acrylic, watercolor, or mixed media?
Paint type dictates what you can safely use. Oil paintings and acrylic paintings are generally more tolerant of a barely damp cloth and mild dish soap, while watercolors and gouache are water-sensitive and should not be cleaned with wet methods. Oil paint often has a soft sheen and visible brush texture; acrylic can look slightly more plastic-like and dries harder; watercolor sits matte and thin.
If you don’t know the medium, assume it’s water-sensitive and stick to dry dusting only. For mixed media or media you can’t identify, consult a conservator before attempting any cleaning at home.
Is there varnish or a fragile surface?
Many oil paintings have a varnish layer that can yellow over time. Varnish can soften with solvents, so at-home “deep cleaning” attempts are risky. Also look for craquelure (fine cracking), active flaking, lifting edges, or thick impasto that can catch fibers from a cloth. Any of these are signs to avoid moisture and scrubbing. Yellowed varnish or lifting paint is best addressed by a professional who can safely remove or reapply varnish without disturbing the paint layer beneath.
When should you call a professional conservator?
If the artwork is antique, high-value, sentimental, or shows mold, smoke or fire damage, severe dirt, tears, or unknown media, skip DIY. A professional will evaluate the canvas, paint, and any coatings, then recommend a tailored plan. You can find a qualified expert via national conservation directories (such as AIC). Request an assessment with images and notes about the painting’s history, where it hangs (living room, kitchen, etc.), and what has been used on it before.
What tools and materials do you need (and what should you avoid)?
You need soft, clean tools and mild solutions; nothing abrasive or chemically aggressive. The goal is to remove dust and surface dirt gently, keep the canvas dry, and avoid anything that can damage paint or leave residues.
|
Item |
Best Use |
How to Use |
Notes & Warnings |
|---|---|---|---|
|
Soft natural-hair or soft-bristled brush |
Dry dust removal from the top down |
Hold the canvas upright and brush gently; keep strokes light and controlled |
Avoid stiff bristles that can abrade paint; never scrub. |
|
Compressed air (upright can) |
Dislodging loose dust from textures and edges |
Short bursts from a safe distance with the can held upright |
Don’t tilt can; avoid freezing propellant contact with the surface. |
|
White microfiber or lint-free cloth |
Light wiping of grime on durable surfaces |
Use barely damp, then immediately follow with a dry pass |
Colored cloths can transfer dye; shedding cloths can leave fibers. |
|
Distilled water |
Diluting mild solutions and light tamping |
Wring cloth until almost dry before touching the painting |
Tap water may leave mineral spots; avoid over-wetting. |
|
Mild, pH‑neutral dish soap |
Creating a soapy water solution for surface dirt |
Mix a few drops per bowl; always spot-test first |
Too much soap can leave residue; avoid harsh cleaners. |
|
Cotton swabs; nitrile gloves |
Detail cleaning of edges and textured passages |
Roll swabs gently, one pass per tip; wear gloves to keep oils off |
Do not scrub; replace swabs frequently to avoid redepositing dirt. |
Cleaners that are safe to use (in moderation)
When learning how to clean a canvas painting, a dilute, pH‑neutral solution is the safest starting point. A few drops of mild dish soap in lukewarm distilled water, applied with a barely damp cloth, can remove general grime on durable oil or acrylic surfaces. Keep moisture minimal, work in small areas, and dry immediately. If the surface turns tacky, matte changes to glossy, or color lifts to the cloth, stop.
Things that can ruin a painting
Alcohol, vinegar, glass cleaner, bleach, degreasers, baby wipes, and “magic eraser” sponges can damage paint, blur inks, and strip protective layers. Strong airflow, vacuuming directly on paint, and heat guns or hairdryers can lift or crack paint. Excess water, dyed or shedding cloths, and aggressive scrubbing are common causes of permanent abrasion. Direct sun during or after cleaning can accelerate drying and lead to surface stress; keep the process shaded and gentle.
How do you clean a canvas painting without damaging it?
The best way to clean a canvas painting at home is to remove dust first, spot-test a mild solution, then wipe gently with a barely damp cloth and dry immediately. Keep your touch light, your passes minimal, and stop if anything looks or feels wrong.
Step 1: Dust the surface correctly

Place the painting upright on a clean easel or stand. Using a soft brush, start at the top and work down in overlapping strokes to remove dust. Keep pressure feather-light so you don’t push dirt into pores or catch raised paint. For textured passages or the edges where dust collects, use a smaller soft brush or a brief, upright burst of compressed air at a safe distance.
Step 2: Spot-test a mild solution

Mix a bowl of lukewarm distilled water with just a few drops of pH‑neutral dish soap to create a gentle soapy water solution. In an inconspicuous corner, touch a barely damp cloth to the surface and lift away. Check the cloth for color transfer and scan the test spot for changes in sheen. If anything shifts, restrict yourself to dry dusting and call a conservator.
Step 3: Wipe with a barely damp, lint-free cloth

Wring your clean white microfiber cloth until it’s almost dry. Working in small sections, wipe gently in a consistent direction, then immediately follow with a dry portion of the cloth to remove residual moisture. Rotate to a fresh, clean area of the cloth frequently so you don’t redeposit dirt. This slow, patient approach is the safest way to clean a painting without compromising the surface.
Want artwork that’s easy to refresh and rearrange? Try Mixtiles. Our lightweight photo tiles and canvas prints go up in minutes and clean with a quick dry wipe. Perfect for living room gallery walls and renters!
Step 4: Detail edges and textured passages

For corners, impasto, or weave texture where grime lingers, use a slightly dampened cotton swab. Roll (don’t scrub) the swab across the surface so you lift dirt rather than grind it in. Switch tips after each pass. If a textured area feels sticky or you see pigment on the swab, discontinue wet cleaning.
Step 5: Dry properly

After cleaning, gently blot with a dry, lint-free cloth. Let the painting air-dry vertically in a cool, shaded, well-ventilated area. Avoid radiators, sunny windows, and bathrooms: heat and humidity can warp canvas and stress paint layers over time.
How do you handle tougher grime, stains, or mold?
Some issues go beyond basic cleaning. Nicotine film, kitchen grease, mold, and yellowed varnish require extra caution. Light, repeated passes may help surface residue, but deeper problems call for professional care to avoid irreversible damage.
Nicotine/smoke film and kitchen grease
Smoke and cooking residues can form a sticky layer on canvas art. Use fresh, mildly soapy distilled water and make multiple gentle passes rather than pressing harder. Never reach for solvents or degreasers; they can damage binders and dull the surface. If the film persists after several careful attempts, stop and consult a conservator for the safest way to proceed.
Water spots and minor scuffs
Very light water marks may diminish with a carefully tamped, distilled-water-damp cloth followed by immediate drying. If you see abrasion, color loss, or scuffs within the paint itself, further DIY cleaning can make it worse. Professional inpainting or surface consolidation may be needed for fine art pieces.
Mold or mildew on canvas
Isolate the painting from other artworks immediately. Do not wet the surface. If you have a HEPA vacuum and a protective screen (like clean window screen) held just above the surface, you can carefully reduce loose spores by drawing air near (but not contacting) the paint. Active growth, a musty odor, or staining requires a conservator, and you should wear appropriate protection to safeguard your health.
Yellowed varnish or darkened surface
Varnish removal is specialized work. The wrong solvent can dissolve paint as well as varnish, and uneven cleaning can leave tide lines that are hard to reverse. If yellowing, bloom, or cloudy patches are the problem, seek an expert’s assessment instead of attempting at-home fixes.
How should you clean framed vs. unframed canvas?
Framing affects access and risk. Clean frames and glazing separately, and keep liquids away from unglazed canvases. Unframed or rolled works need extra support so the canvas doesn’t flex while you work.
Stretched canvas in a frame
Start by dusting the top of the frame so debris doesn’t fall onto the painting. If there’s glazing (glass or acrylic) over the artwork, clean the glazing only and never spray cleaner near the edges; apply to a cloth first. For unglazed framed paintings, slip a clean card or paper as a shield between frame rabbet and paint edge while detailing those tight spots, then proceed with the same gentle, barely damp method described above.
Rolled or unframed canvas
Place the canvas on a clean, smooth board to support the fabric from behind and prevent flexing. Work slowly, and avoid pressing into areas with cracking or raised paint. If a loose canvas is rippled or creased, consider temporary mounting or professional stretching before wet cleaning to reduce stress on the paint layer.
How can you keep your canvas cleaner for longer?
Prevention is powerful. Stable light, temperature, and humidity, plus routine dusting, can dramatically reduce the need for wet cleaning and help your artwork look like new for years.
Display tips (light, heat, humidity)
Avoid direct sunlight and hot spots above fireplaces or radiators. Kitchens and bathrooms expose canvas to grease and steam that can settle as dirt or cause warping. A good range is roughly 40–55% relative humidity and stable, comfortable room temperatures. In the living room or bedroom, choose interior walls away from vents, and allow air to circulate behind large paintings.
Routine dusting schedule
Gently dust the top edge and face of your painting every one to three months, depending on your home environment. Regular light maintenance is the best way to clean your canvas without resorting to wet methods. Keeping HVAC filters fresh and avoiding candles or indoor smoking near artwork also helps reduce airborne particulates that settle on surfaces.
Storage and moving
For storage, wrap paintings in acid-free, archival paper with corner protectors. Store vertically with spacers so works don’t lean face-to-face, and keep them off concrete floors. When moving, carry one painting at a time, holding both sides of the frame or stretcher to avoid flexing the canvas.
Can you use the same method for canvas prints and photo tiles?
Not exactly. Printed canvases are often factory-sealed and typically tolerate light wiping better than hand-painted fine art. Mixtiles photo tiles and canvas prints are even easier: just dust or lightly wipe the frame (no water on the print face) and you’re done.
Printed canvas vs. hand-painted surfaces
A printed canvas usually has a protective coating, making a dry microfiber wipe the preferred first step. If needed, a very lightly damp cloth can be used on stubborn spots after a spot-test on the back or side edge. Hand-painted canvases vary widely and can be sensitive to moisture or abrasion, so proceed conservatively and prioritize dry dusting.
Low-maintenance wall decor: Mixtiles care tips
Mixtiles are designed for easy care at home. Dust with a dry microfiber cloth, and for fingerprints on frames, lightly wipe the frame surface only (avoid soaking or spraying). Because our tiles are adhesive and repositionable, you can move them away from kitchens or humid areas in seconds. Want a fresh look? Rearrange your gallery wall without tools or nails, and explore our Gallery Wall Kits, Photo Books, and Fine Art Prints to build a collection you’ll love over time.
A safe clean starts with gentle dusting, careful spot-testing, and minimal moisture. When deciding how to clean a canvas painting, identify the medium, examine the surface, and avoid harsh chemicals that can damage paint. For valuable, antique, or compromised works, a conservator is the best way forward. With smart display habits and routine care, your canvas art will stay vibrant longer. And if you prefer easy-care decor, Mixtiles makes it simple.
Refresh your walls the easy way: create with Mixtiles today on our app or website. They stick, restick, and wipe clean. No nails, no tools, no hassle.
Frequently Asked Questions
What’s the safest way to clean a canvas painting at home?
Dust top to bottom with a soft brush. Spot-test a barely damp, white microfiber cloth with a few drops of pH‑neutral soap in distilled water. Wipe gently in small sections and dry immediately. Stop if color transfers, sheen changes, or the surface feels tacky.
Which cleaners and tools are safest for canvas paintings?
Use a soft natural-hair brush, white microfiber cloth, distilled water, and a tiny amount of pH‑neutral dish soap. Avoid alcohol, vinegar, glass cleaner, bleach, baby wipes, degreasers, and abrasive sponges. Keep moisture minimal:no soaking, spraying, or vacuuming directly on paint.
How do you clean an acrylic painting on canvas?
Acrylics tolerate light wet cleaning. After dusting, use a barely damp microfiber cloth with a few drops of mild, pH‑neutral soap in distilled water. Wipe lightly and dry right away. Avoid solvents, hard pressure, or scrubbing, especially over thick impasto. Always spot-test first.
What do conservators use to clean paintings (and should you)?
Conservators choose tailored aqueous or solvent systems (e.g., specific alcohols, mineral spirits, gels) after testing to protect paint and varnish. These are not DIY methods. For valuable, smoke-stained, moldy, or yellowed works, skip home cleaning and contact a professional.

Be the first to know — deals, news & decor ideas.
By clicking you agree to the Terms of Use & Privacy Policy