Texture Painting on Canvas: Techniques & Materials Guide
Key Takeaways
- Learn why adding texture brings depth, dimension, and creative freedom to your canvas art.
- Discover essential materials and tools, from modeling paste to joint compound and palette knives.
- Master a variety of techniques: impasto, glazing, underpainting, dry brushing, scraping, and mixed media.
- Follow a step-by-step beginner project to create your own textured masterpiece.
Transforming a flat canvas into a dynamic, tactile work of art might seem like a complex endeavor, but it's an accessible and incredibly rewarding process. Texture painting allows artists to move beyond two dimensions, inviting viewers not just to see but also to feel the artwork. This guide will walk you through everything you need to know about texture painting on canvas, from essential materials to creative techniques, helping you add a unique dimension to your artistic creations.
Want to bring dimension to your space the easy way? Start with Mixtiles Canvas Prints or Photo Tiles: lightweight, peel-and-stick, and ready to hang.
Why Add Texture to Your Paintings?
Texture refers to the raised, three-dimensional quality created on the surface of a painting using mediums or tools, making the artwork visually dynamic and tactile. Adding texture to your paintings offers a multitude of benefits, elevating a simple image into an immersive experience.
First, it adds depth and visual interest. A textured surface catches light differently across the painting, creating shifting highlights and shadows as the viewer moves. This subtle change gives the artwork a sense of energy and presence.
Second, it invites a tactile connection. Texture makes people want to reach out and feel the surface. Even when they do not touch it, that instinct engages another sense and deepens their relationship with the piece.
Finally, it unlocks new modes of expression. You can suggest the rugged grit of a rocky path, the soft roll of fabric, or an abstract field of relief. Texture becomes an extra layer of language that helps you communicate mood, movement, and materiality.
What Materials Do You Need for Texture Painting on Canvas?
To start texture painting on canvas, you’ll need a combination of specialized mediums and basic tools. These include pastes like modeling paste or joint compound, thick paints such as heavy body acrylics, and application tools ranging from palette knives to everyday household items. Many of these supplies are affordable and easy to find, even outside art stores.
Texture Mediums & Pastes
These are the backbone of most textured artworks, designed to add bulk and body to your paint or to be used on their own.
- Modeling Paste: A thick, opaque, and flexible medium that can be sculpted and shaped. It dries hard and can be sanded, carved, or painted over. Ideal for creating significant relief and structural elements.
- Joint Compound: A versatile, affordable alternative to modeling paste, often found in hardware stores. It has a smooth, spreadable consistency that makes it easy to apply over large surfaces. Once dry, it hardens into a durable layer that can be sanded, carved, or painted over, much like modeling paste. While less flexible and more prone to cracking if applied too thickly, it’s ideal for creating broad textured areas or experimental mixed-media surfaces at a lower cost.
- Gel Medium: Available in various viscosities (heavy gel, soft gel), gel mediums are often translucent or semi-translucent, adding body and gloss while extending paint. Heavy gel is excellent for creating peaks and impasto effects.
- Gesso: While primarily used as a primer, gesso can be applied thickly to create subtle textures, especially when layered or manipulated with tools. Black gesso can add dramatic depth.
- Heavy Body Acrylic Paint: A naturally thick acrylic paint formulated to hold peaks and brushstrokes without the need for added mediums. Its buttery consistency makes it perfect for impasto and textured strokes, giving you control over sculptural details directly with the paint itself.
Foundational Tools
Beyond traditional brushes, a variety of tools can help you achieve different textured effects.
- Palette Knives: Indispensable for applying thick mediums, scraping, spreading, and creating sharp edges or smooth transitions. They come in various shapes and sizes.
- Sponges: Natural or synthetic sponges can be used for dabbing, creating mottled textures, or lifting paint.
- Stiff Brushes & Rollers: Rigid brushes and textured rollers can scrape, drag, or spread paint and mediums, creating bold strokes or subtle surface patterns.
- Combs & Texture Tools: Specialty tools designed to create linear patterns, grooves, or unique impressions in wet medium.
- Unconventional Items: Don't limit yourself! Bubble wrap, crumpled foil, coarse fabric, a stiff brush, or even your fingers can be excellent tools for creating unique textures.
What Are the Main Techniques for Texture Painting?
The main techniques for texture painting include impasto, palette knife work, underpainting, glazing, dry brushing, scraping, and mixed media. Each method offers unique ways to build depth and dimension, whether by layering thick paint, highlighting raised areas, or incorporating unconventional materials into the canvas.
Impasto Technique
Impasto is perhaps the most well-known texture painting technique, involving the application of thick paint in layers so that the brushstrokes or palette knife marks are visible and create a palpable surface. This method not only adds depth but also makes the colors appear more vibrant.
You can achieve impasto by using paint straight from the tube, mixing it with heavy gel medium, or even combining it with modeling paste for extreme relief. Build up layers patiently, allowing each to dry sufficiently if you desire distinct, overlapping textures.
Palette Knife Painting
Palette knives are versatile tools for creating texture. Instead of smoothing the paint with brushes, you can spread it in thick layers, scrape it to reveal underlayers, or drag it across the surface to leave ridges and peaks. Different knife shape (flat, pointed, or angled) allow for a wide range of effects, from broad swathes of color to delicate, sharp edges. This method is especially effective for abstract compositions or landscapes that benefit from dramatic relief.
Underpainting
Underpainting refers to creating a base layer of color before adding texture. This first layer sets the overall tone of the painting and ensures that hints of color shine through textured layers above. For example, a warm underpainting beneath a cool palette can create contrast and visual harmony. This technique is particularly useful when scraping or layering, as glimpses of the underpainting enrich the depth of the finished piece.
Glazing
Glazing involves applying thin, transparent layers of color over a textured surface. These layers allow light to pass through and bounce off the texture below, creating a glowing, luminous effect. By using glazing medium mixed with acrylic paint, you can shift tones subtly, add richness, or highlight raised areas without covering the texture underneath. Glazing works beautifully on impasto or palette knife surfaces, enhancing dimension without overpowering detail.
Dry Brushing
Dry brushing is a simple but powerful way to emphasize texture. Load a stiff brush with a small amount of paint, then lightly drag it across the raised areas of the canvas. The peaks catch the color, while the valleys remain darker, producing a highlighted, weathered look. Metallic or contrasting paints work particularly well with this method, as they bring out the relief and add striking depth.
Scraping
Scraping is both a subtractive and creative technique. By dragging a palette knife, comb, or flat-edged tool across wet paint or paste, you can reveal layers underneath or carve lines into the surface. This method adds rhythm and rawness, perfect for abstract works or for simulating natural patterns such as wood grain or stone. Scraping can also be combined with underpainting to expose vibrant base colors.
Adding Texture with Everyday Objects
Unleash your creativity by experimenting with simple items you already have at home. These tools are used to stamp, drag, or press patterns into wet paint or medium, then removed to reveal unique effects.
- Bubble Wrap: Press into wet paint or paste and lift away to create a repeating circular pattern.
- Forks & Combs: Drag through wet paste to form parallel lines, grooves, or wave-like designs.
- Sponges: Dab to achieve mottled or organic textures.
- Stencils: Apply paste through a stencil for raised shapes and patterns.
Mixed Media & Additives
Take texture a step further by permanently embedding materials into your artwork. These elements remain part of the finished surface, adding both tactile interest and visual variety.
- Sand or Sawdust: Sprinkle into wet medium for a gritty, rough finish.
- Fabric or Lace: Press into paste and leave in place, painting over once dry for a textile-like relief.
- Paper or Cardboard: Layer into wet areas to create depth and structure.
- Natural Fibers: Twine, leaves, or dried plants can be integrated for organic effects.
Want a faster path to art on your wall? Upload your photos and get Mixtiles Canvas Prints that hang without nails: clean, quick, and gallery-worthy.
Step-by-Step: A Simple Texture Painting Project For Beginners
Let’s put these techniques into practice with a straightforward project to get you started.
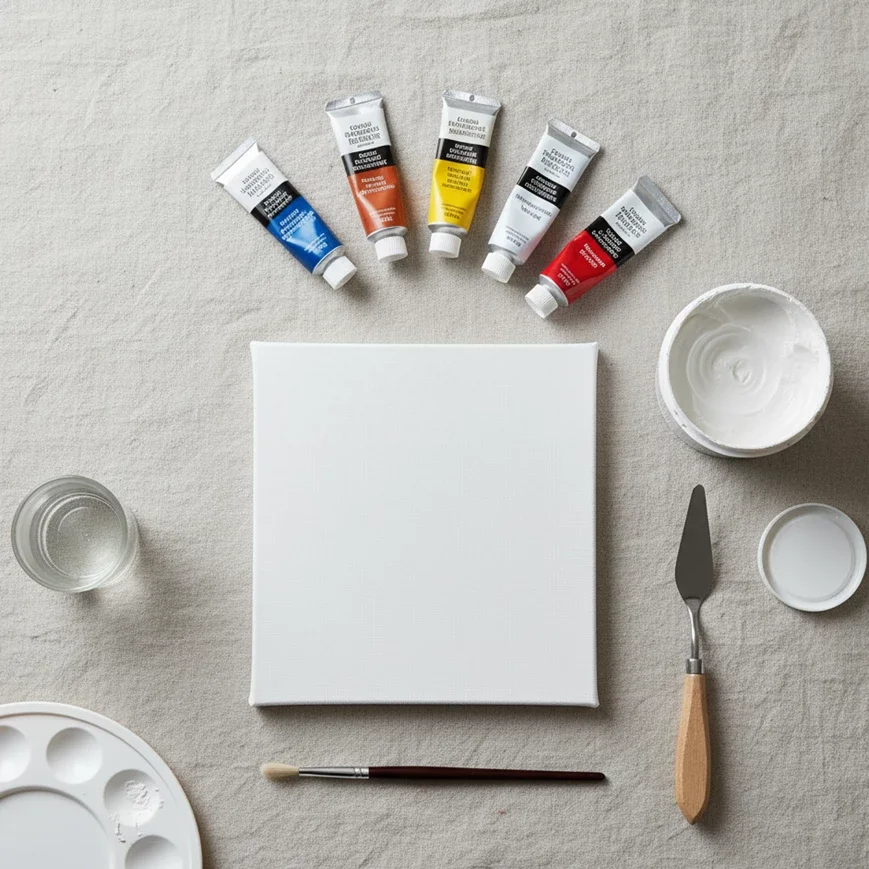
Step 1: Gather Your Materials You'll need a canvas, modeling paste (or heavy gel medium), a palette knife, acrylic paints, and a brush.
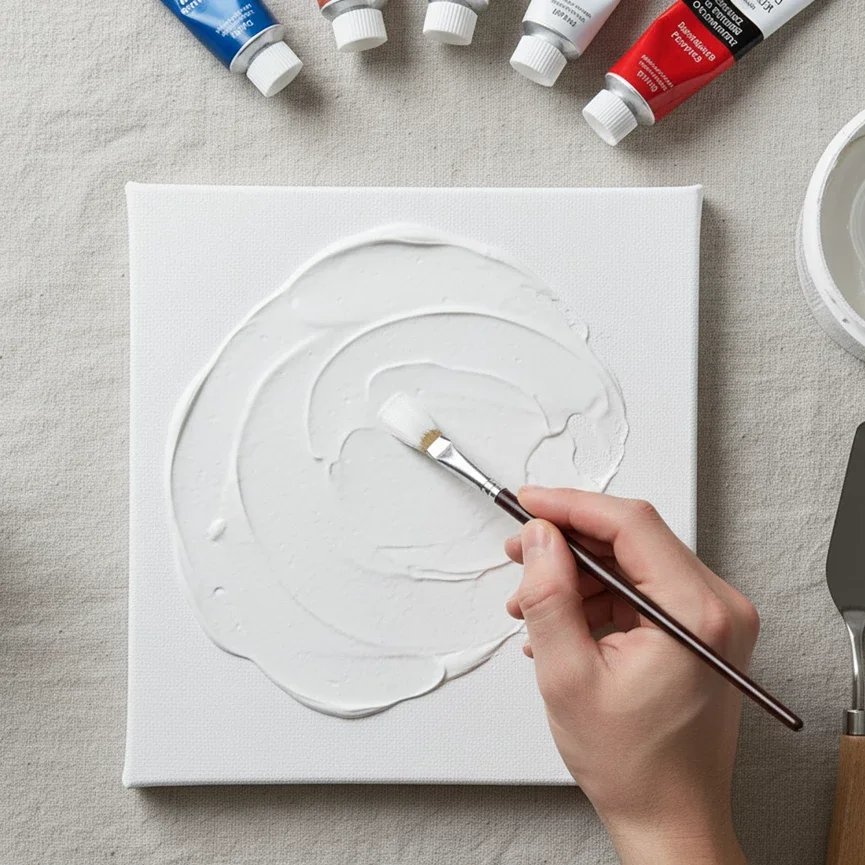
Step 2: Prepare the Canvas Ensure your canvas is clean and, if desired, apply a base coat of gesso. This step isn't strictly necessary for texture, but it can provide a good foundation.
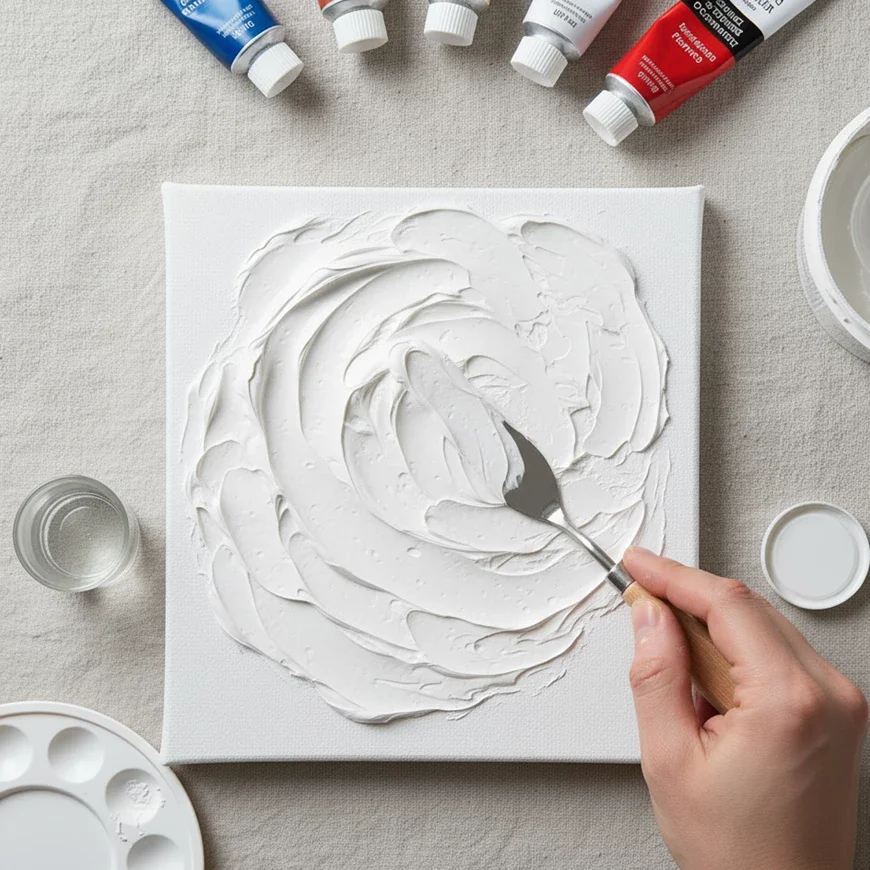
Step 3: Apply the Texture Medium Using your palette knife, scoop a generous amount of modeling paste. Spread it onto your canvas, experimenting with different strokes. You can create peaks, valleys, smooth areas, or even patterns. Don't be afraid to experiment!
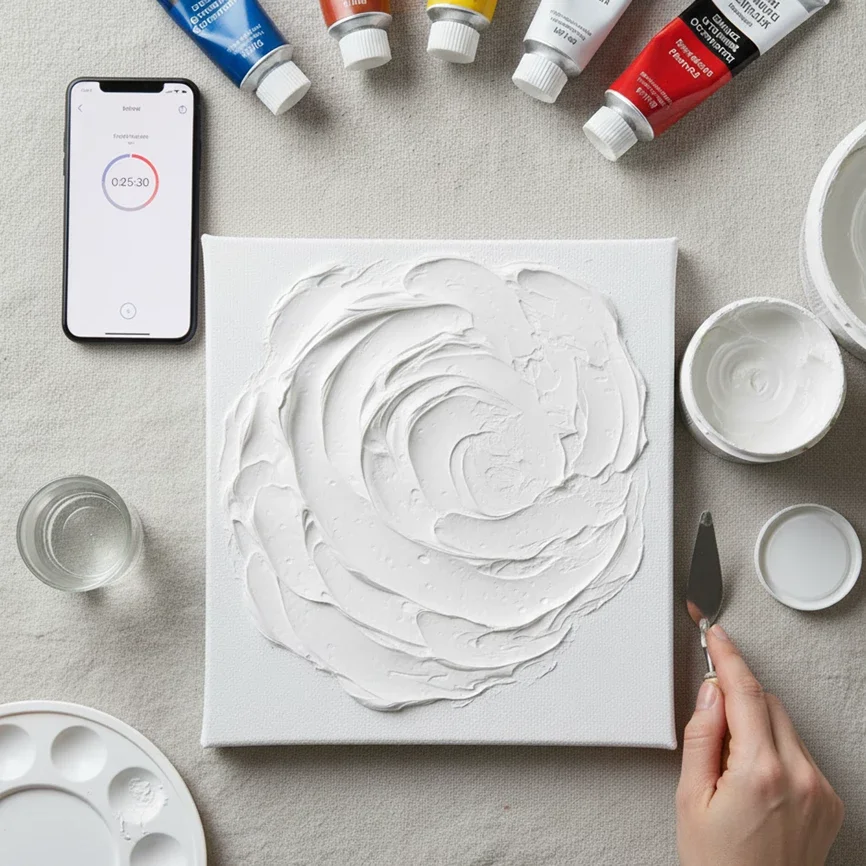
Step 4: Let It Dry Allow the texture medium to dry completely. This can take several hours, or even overnight, depending on the thickness of the application and humidity. Ensure it's fully cured before proceeding.
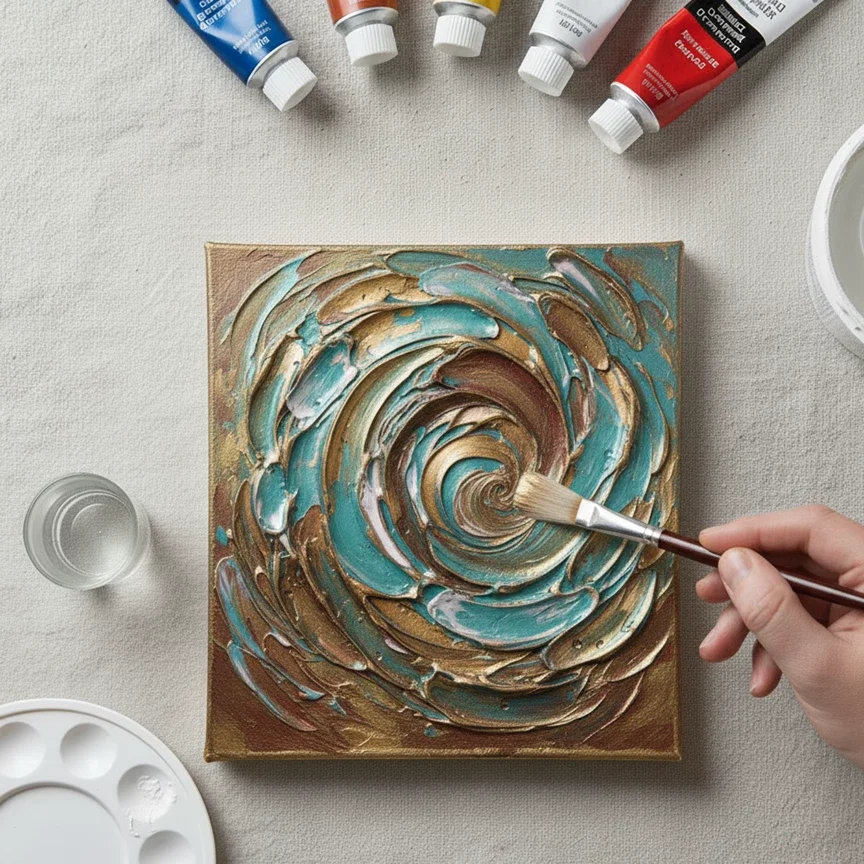
Step 5: Paint Over the Texture Once dry, you can begin to paint over your textured surface. Acrylic paints work wonderfully, as they dry quickly. Notice how the paint settles into the crevices and highlights the raised areas, adding depth and shadow. Experiment with dry brushing (lightly dragging a brush with minimal paint over the raised areas) to emphasize the texture.
How Does Color Influence Textured Art?
Color and texture are intimately linked. Texture can dramatically alter how color is perceived. A textured surface catches light and shadow, which can make a single color appear to have multiple shades and tones. Light will illuminate the raised areas, making them appear brighter, while shadows will fall into the depressions, creating darker, more intense tones. Consider how your chosen colors will interact with the physical landscape of your canvas, enhancing the overall impact of your textured masterpiece.
Texture painting on canvas opens up an endless field of artistic exploration. By playing with reliefs, shadows, and light, you transform a simple flat surface into a vibrant, captivating work of art. Whether you choose traditional mediums like modeling paste, experiment with classic techniques such as impasto, or incorporate unexpected materials, each attempt becomes an opportunity to express your creativity in a unique way.
Create a gallery wall you’ll love. Explore Mixtiles Canvas Prints for a rich, dimensional look, or choose Photo Tiles for easy peel-and-stick hanging.
Frequently Asked Questions
What is the best medium for texture painting?
The "best" medium depends on your desired effect. Modeling paste is excellent for opaque, sculptural textures. Heavy gel medium is great for transparent or translucent textures and mixing with paints. Gesso can offer subtle tooth and build-up.
Can you use regular paint for texture?
While you can apply regular acrylic paint thickly to create some texture (impasto), it won't achieve the same dramatic, structural effects as dedicated texture mediums. Regular paint may also crack if applied too thickly without a medium to give it flexibility.
How long does texture paste take to dry?
Drying time varies greatly depending on the thickness of the application, the specific product, and environmental humidity. Thin layers might dry in a few hours, while very thick applications can take 24-48 hours or even longer to fully cure. Always ensure it's completely dry before painting over it.
How do you seal a textured canvas?
After your paint and texture mediums are fully dry, you can seal your textured canvas with a varnish. Choose a matte, satin, or gloss varnish depending on your desired finish. Spray varnishes are often easier to apply evenly on textured surfaces than brush-on varnishes.
Can you texture canvas without gesso?
Yes, you can apply paste or mediums directly onto raw canvas, but gesso provides a sealed, stable base. It prevents absorption, improves adhesion, and reduces the risk of cracking. For durable, long-lasting textured artwork, priming with gesso is strongly recommended.
Is texture painting good for beginners?
Absolutely! Texture painting is beginner-friendly and rewarding. Simple tools like palette knives or sponges make it easy to experiment. Starting with basic techniques builds confidence, while more advanced methods can be explored over time, encouraging creativity and personal expression at every skill level.
Be the first to know — deals, news & decor ideas.
By clicking you agree to the Terms of Use & Privacy Policy
