
Gallery Wall Size: Perfect Proportions for Your Space
Key Takeaways
- Aim for a gallery wall width of about 2/3–3/4 of the furniture beneath it, with 2–3 inches between frames and a center height around 57 inches;
- Pick a layout (grid, organic, row, or staircase), then use a simple formula to calculate display size before ordering frames or tiles;
- Size by room: scale up for large living rooms and staircases; tighten gaps and frame sizes for hallways, entries, and small nooks;
- Mixtiles’ adhesive, repositionable tiles make measuring less stressful. Stick, adjust, and swap without damage.
Measuring a gallery wall size doesn’t need to be guesswork. With a few rules of thumb and a simple formula, you can get the perfect proportions, spacing, and height for any wall without extra holes. This guide breaks down how big your gallery wall should be based on your room, furniture, and layout, plus the math to make it effortless with Mixtiles’ stick‑and‑restick photo tiles.
Ready to design? Open the Mixtiles app to pick tiles or canvas prints, and create a perfect layout in minutes.
How big should your gallery wall be for your space?
Start with scale. Over furniture, target a width that feels anchored: not too small, not too sprawling. On a bare wall, fill enough area to read as one cohesive piece of art. Then fine‑tune height and spacing so your gallery wall looks intentional and comfortable to view.
Use the golden proportion rule for width: if your sofa is 84 inches (213 cm), your gallery wall should span roughly 56–63 inches (142–160 cm). For bare walls, filling about 50–60% of the wall width creates balance in most rooms. For height, aim to keep the center of the display around 57 inches (145 cm) from the floor on empty walls. When placing over furniture, start the bottom row about 7–10 inches (18–25 cm) above the top edge of the furniture to create breathing room.
Spacing is the secret sauce. Keep gaps at 2–3 inches (5–7.5 cm) between frames so the gallery reads as one composition. In compact spaces (like narrow hallways or entries) tighten to 1.5–2 inches (4–5 cm) for a crisp, unified look.
Which gallery wall layout works best, and how does that affect size?
Pick the layout that matches your room and the story your photos or prints want to tell. Symmetrical grids feel modern and polished; organic layouts feel collected and creative. Each choice affects how large your display should be and how you measure it.
Grid gallery walls

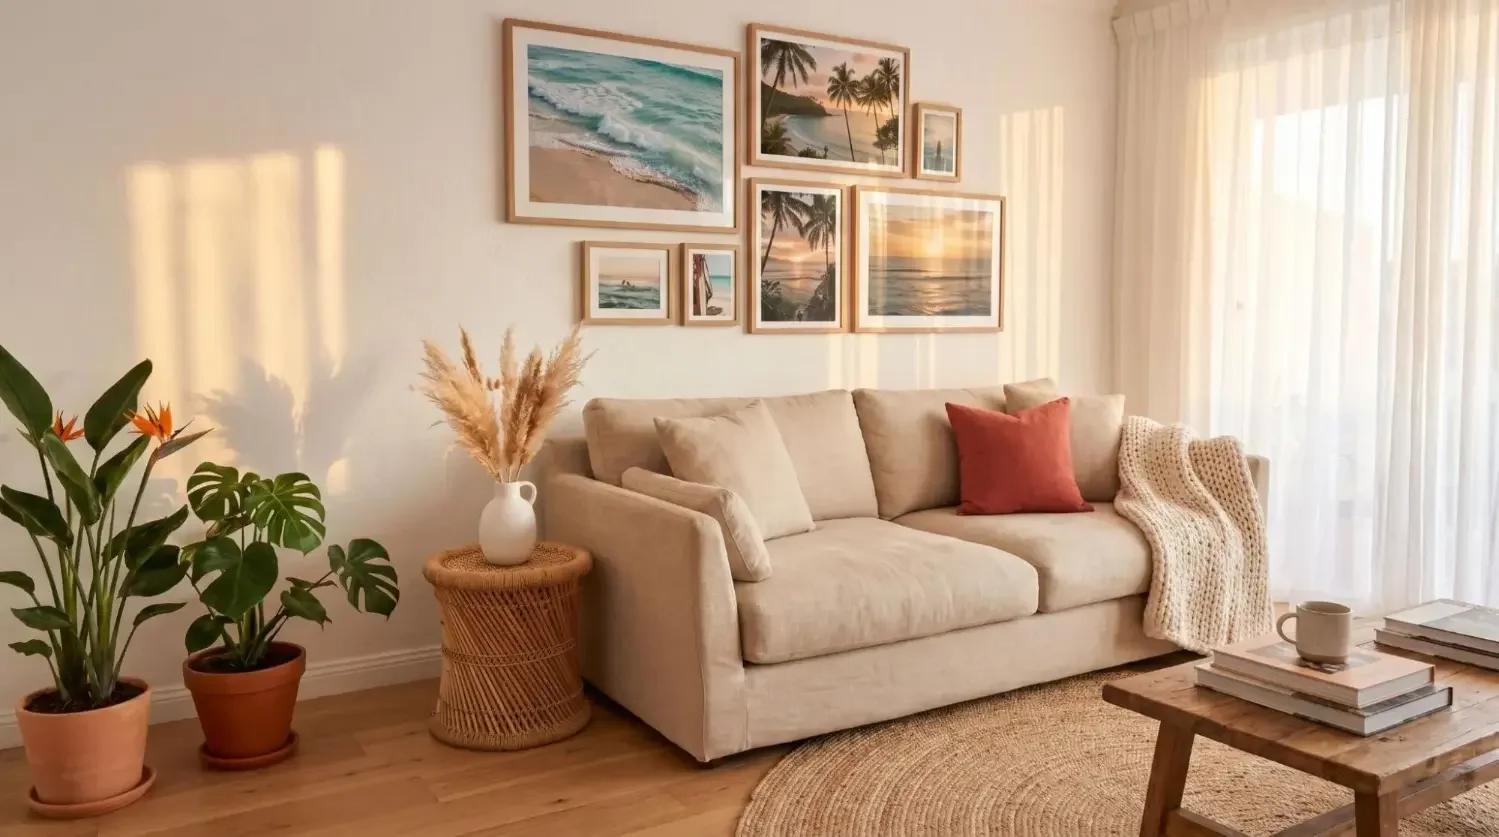
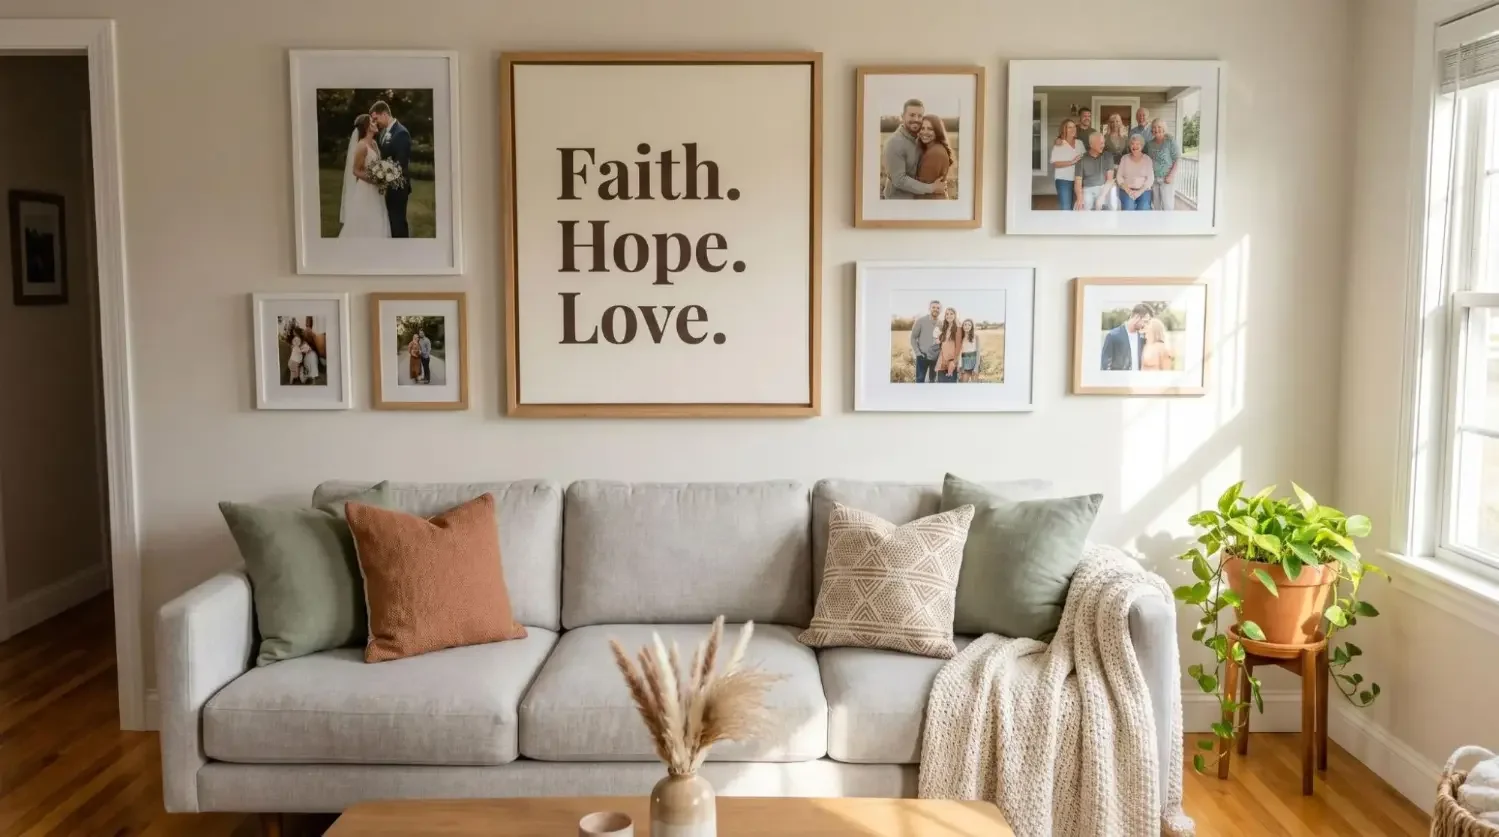
Grids deliver symmetry, clean lines, and big impact. Because every frame or tile matches, the display reads like one statement piece. Tightening the gap slightly (closer to 2 inches) boosts cohesion. Grids shine above consoles, sofas, and in hallways where a structured design makes the space feel tailored.
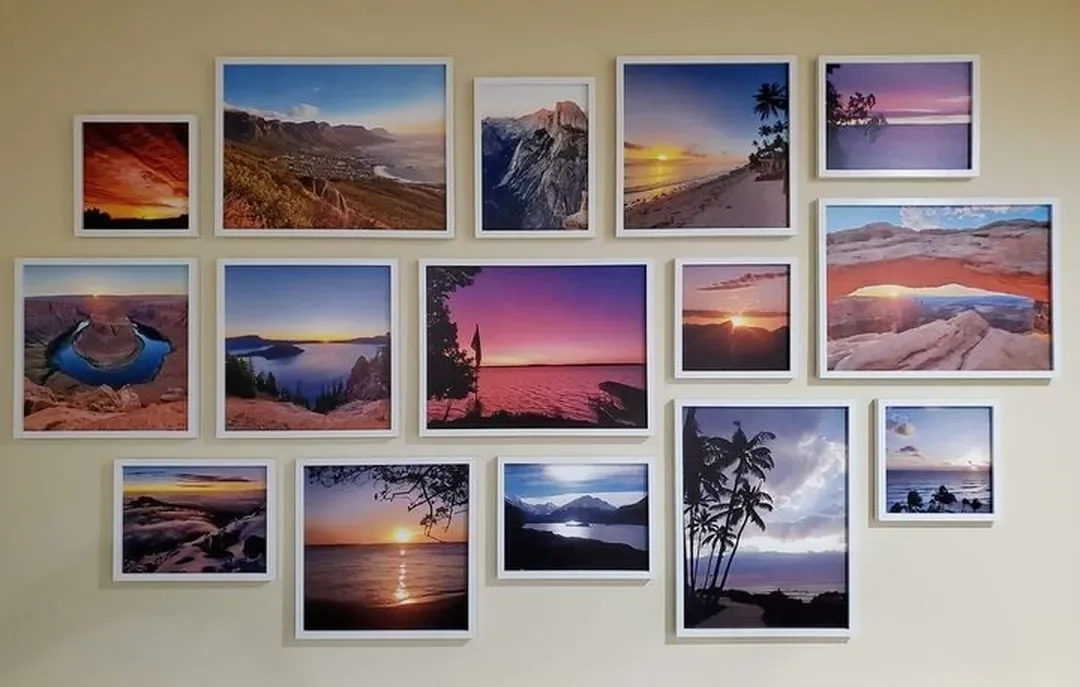
Organic (freestyle) gallery walls

Organic galleries mix sizes, orientations, and even media, built around a visual anchor (often your largest piece). Define a “bounding box” for the outer edges and keep your total footprint within the width and height you’ve targeted. Even with a relaxed look, keep spacing consistent so the wall doesn’t feel chaotic.
Linear rows and triptychs/diptychs

Rows, triptychs, and diptychs are minimal and airy: great when you want focus without visual noise. Over sofas and beds, make sure the total line length still follows the 2/3–3/4 rule relative to the furniture beneath.
Staircase gallery walls

Follow the incline. Keep your gaps and the midline consistent as you step frames upward. Because the display stretches visually, smaller pieces in more rows often feel rhythmical and elegant along a stair.
How do you calculate the right gallery wall size (without overthinking it)?
Use one easy formula for width and height. Choose your columns, rows, piece size, and your preferred gap. A quick sketch and tape measure will confirm you’re on target before you order frames or tiles.
The sizing formula you’ll actually use
Display width = (columns × piece width) + ((columns − 1) × gap). Display height = (rows × piece height) + ((rows − 1) × gap).
Example (grid over a sofa)
Say your sofa is 90 inches (229 cm) wide. Target gallery width is about 60 inches (152 cm). If you want three columns and a 2-inch (5 cm) gap, solve: 3 × piece width + 2 gaps (4 inches) = 60 inches. Piece width ≈ 18.7 inches (round to the nearest available size). Repeat vertically using your row count, keeping the bottom row 7–10 inches above the sofa.
Example (hallway grid)
Wall section is 44 inches (112 cm) wide. With three columns and 1.5-inch (4 cm) gaps, solve: 3 × piece width + 3 inches = 44 inches. Piece width ≈ 13.7 inches. Choose 12–14 inch frames or tiles and adjust gap slightly to fit comfortably.
Three quick steps to measure with confidence:
- Mark your target footprint with painter’s tape and note your ideal width and height;
- Pick columns, rows, and a gap, then use the formula to confirm piece size;
- Lay frames on the floor or use paper templates on the wall to test spacing before hanging a gallery.
Prefer not to do math? Choose a Mixtiles Gallery Wall Kit with pre‑curated layouts and templates. Peel, stick, and adjust until it’s perfect.
What distance between frames looks best, and when should you break the rule?
The sweet spot is 2–3 inches (5–7.5 cm). Wider gaps fragment the composition; tighter spacing unifies it. In smaller rooms, compress to 1.5–2 inches to keep your gallery reading as one design. If you’re mixing sizes, keep the gap consistent and align either centers or edges so your arrangement feels intentional.
How high should you hang a gallery wall?
On empty walls, aim for a 57‑inch (145 cm) center height; a museum‑inspired guideline that keeps viewing comfortable. Over furniture, begin the bottom row 7–10 inches (18–25 cm) above the top, then build upward. Along stairs, mirror the rise: tape a guide line parallel to the handrail and keep the midline of your frames traveling along it. For more layout ideas and arrangement tips, explore our guide on how to hang a gallery wall.
What gallery wall size works best by room?
Rooms set the rules. Open living spaces can handle larger displays; narrow halls and entries reward tighter gaps and smaller pieces. Use the same proportion targets, then scale pieces and row counts to fit.
Living room
Over a sofa or console, stick to 2/3–3/4 of the furniture width and 2–3 inch gaps. Large rooms love 3×3 or 4×3 grids, or an organic cluster anchored by one larger frame for balance.
Bedroom
Above the headboard, use a triptych or tight grid that matches 2/3–3/4 of the bed width. Keep the bottom row 8–10 inches (20–25 cm) above the headboard so your wall art doesn’t feel crowded.
Hallways and entryways
Think vertical stacks, 2×3 grids, or 1×3 rows with 1.5–2 inch gaps to reduce visual clutter. Double‑check door clearances and sightlines so your new gallery wall feels welcoming, not busy.
Staircase walls
Use more, smaller pieces for rhythm, maintaining consistent spacing along the incline. Keep the midline aligned to the handrail angle for a cohesive climb.
How many frames do you need, and what sizes should you pick?
Choose the count to match your footprint. Minimalists might love a 2‑piece diptych or 3‑piece triptych. For balanced impact in most homes, a 2×2 grid is compact and centered; 3×2 and 3×3 grids deliver classic statement scale. Organic clusters with 6–12 pieces work beautifully when you anchor the composition with one larger frame and support it with medium and small frames.
If your art/photos are small
Use mats to increase the visual footprint of each photo or print. A tight grid with uniform gaps keeps small pieces feeling intentional. You can also group related prints into mini‑clusters that sit within your overall bounding box.
How do Mixtiles make gallery wall sizing and hanging easier?
Mixtiles tiles and canvas prints are lightweight with adhesive or magnetic mounting, so you can stick, step back, and adjust until the gallery looks perfect. No nails, no damage, no stress. Uniform tile sizes make the math trivial for grids, rows, and stair layouts, while the Mixtiles app lets you preview scale and spacing on your actual wall before you order. Want zero measuring? Our Gallery Wall Kits include templates and curated designs to help you create a polished gallery wall in under an hour.
Care and compatibility are simple: tiles adhere best to clean, smooth, painted walls. Wipe surfaces with a dry microfiber cloth before installation, and avoid heavy textures or raw brick. To refresh your home with new photos, just swap tiles: no patching, no repainting.
Getting gallery wall size right comes down to a few reliable numbers: 2/3–3/4 of your furniture width, a 57‑inch center height on empty walls, and 2–3 inch gaps. Choose a layout that suits your room, run the quick width/height formula, and your gallery walls will look intentional and balanced, every time.
Design your perfect‑size gallery wall now. Open the Mixtiles app to plan, visualize, and order adhesive, repositionable frames you’ll love. Then enjoy hanging a gallery with zero holes.
Frequently Asked Questions
How big should my gallery wall be?
Over furniture, aim for a width about two‑thirds to three‑quarters of the piece beneath. On bare walls, fill roughly 50–60% of the wall width. Keep 2–3 inch gaps between frames and place the display’s center near 57 inches from the floor.
What are the basic rules for a gallery wall?
Keep spacing consistent (ideally 2–3 inches), center the arrangement around 57 inches on empty walls, and align edges or centers for cohesion. Over furniture, start 7–10 inches above the top. Define a clear bounding box and mock up with painter’s tape first.
What is the 2/3 rule for wall art?
When hanging art above furniture, the total width of your gallery should be about two‑thirds to three‑quarters of the furniture’s width. This proportion looks balanced and “anchored,” preventing a display that feels too small or overpowering.
How do I choose frame or tile sizes for a gallery wall?
Use: width = (columns × piece width) + ((columns − 1) × gap); height = (rows × piece height) + ((rows − 1) × gap). Pick 2–3 inch gaps, test with tape, then select the nearest available size for a clean fit.
Be the first to know — deals, news & decor ideas.
By clicking you agree to the Terms of Use & Privacy Policy